Menu Settings
1 . How to Create a Menu in a WordPress with Classic Editor
Go to WordPress Dashboard > Appearance> Menu
You can add a menu here.
- Click the “Create a new menu” button and enter a name in the Menu Name field.
- Under Menu Settings > Display Locations, select the locations to display the menus.
- Click the “Create Menu” button to create the Menu.

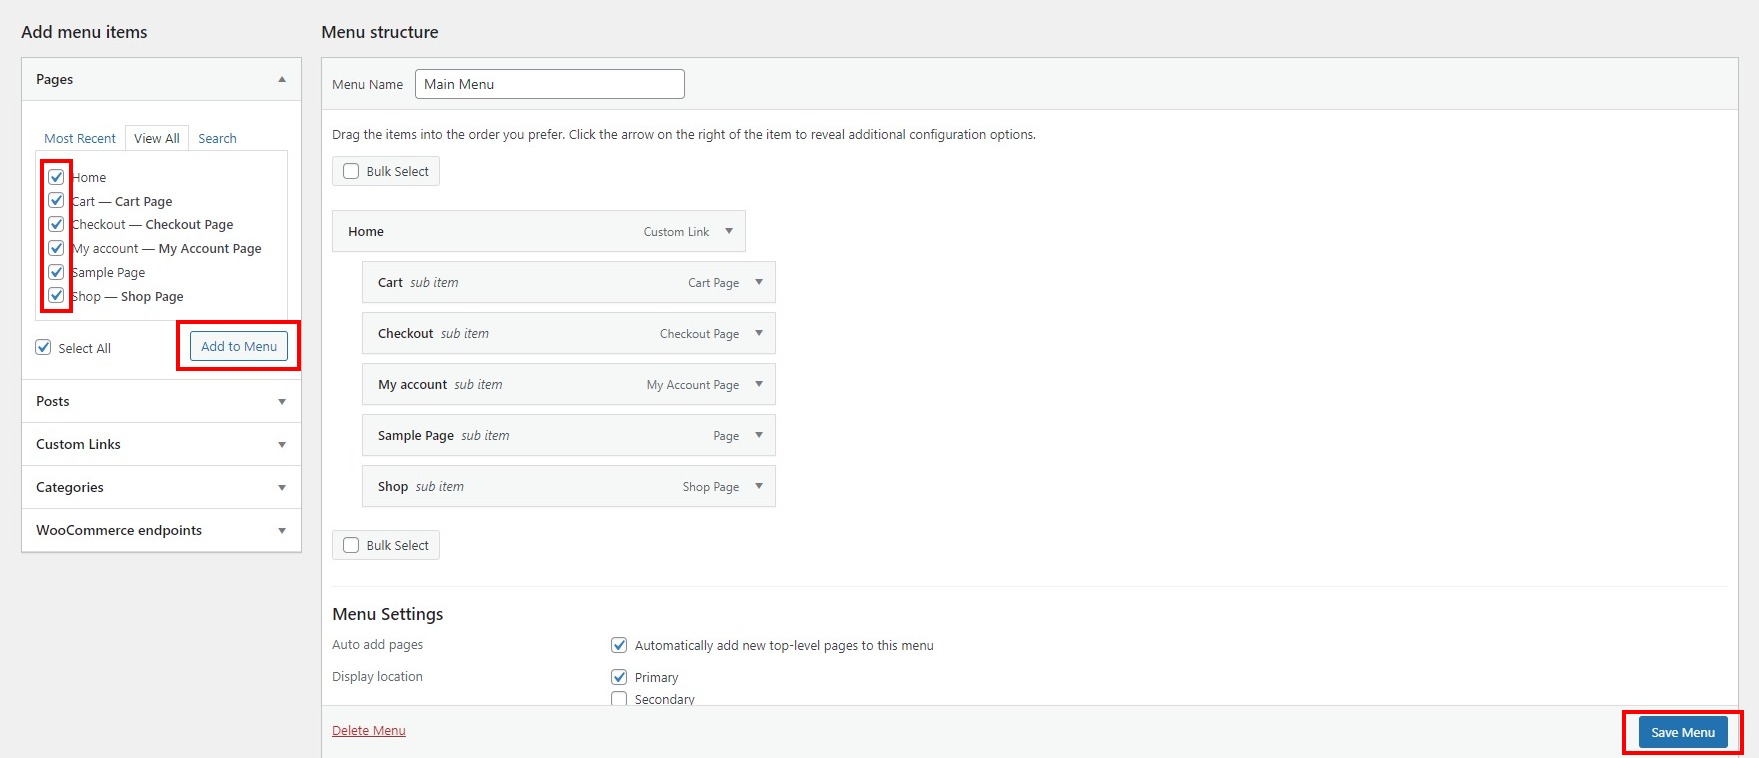
Adding pages and posts to the WordPress menu
Upon creating your new Menu, you can now add items to it, change their order of appearance and create sub-levels:
- Select Pages, posts, or custom links from the “Add menu items” section, and click the “Add to menu” button to add them to the Menu. Added items will appear in the Menu structure section to the right.
- Drag items up or downwards to change their order of appearance, or create sub-levels by dragging an item to the right or left.
Add a Custom Link
- Select “Custom Links” in the Add Menu Items section
- Enter the URL to your site.

2 . How to Create a Menu in a WordPress with Customize.
Once you’ve made a navigational plan or sitemap, you’re ready to create your menus. Within WordPress, navigate to Appearance > Customize > menu, then click on Menus:

If you don’t have a menu set up yet, you can simply select Create New Menu to get started. You’ll be given the option to name your menu and choose where it will appear:

Keep in mind that the locations for your menu will vary depending on your theme. When you’ve made your choices, click on Next and select the Add Items button. Now, it’s time to start building your menu!
Add Your Navigation Items
For each new menu you add to WordPress, you’ll be able to include any of your pages, posts, and other content. You’ll see each of your site’s elements separated into various sections, and they’re all selectable. Just click on an item to add it to your menu:
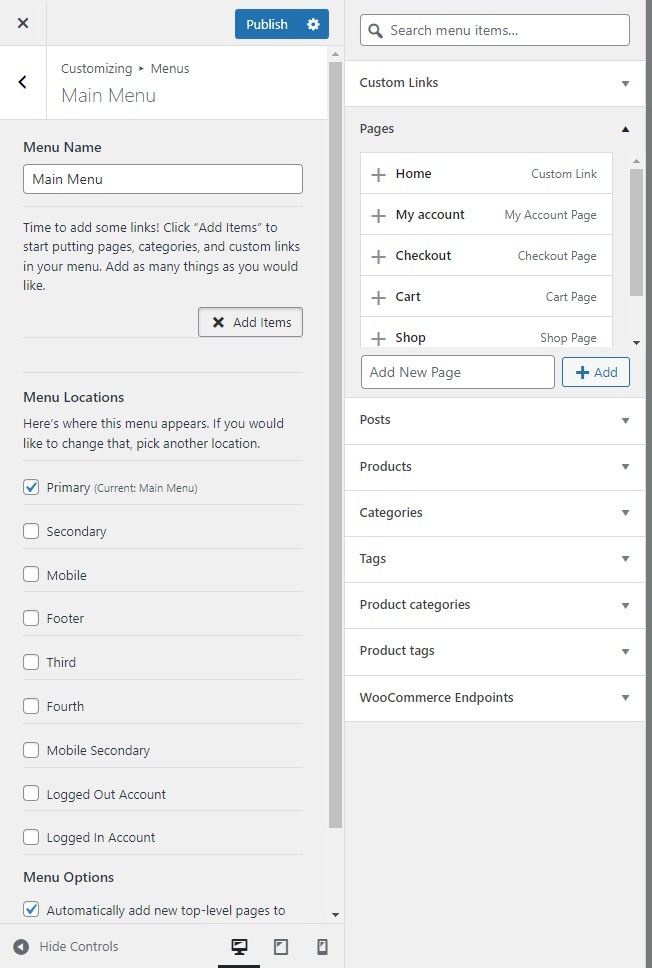
Once selected, you’ll see the item show up in the left-hand column. If you make a mistake, you can select the red X icon to delete an entry. You can even create new content here and immediately add it to your menu. For example, to add a new page, you simply need to type a name for it in the box at the bottom of the Pages section, then select the Add button.
As you add items, you should see them appear on your site in the preview panel. This useful feature lets you see what your menu looks like as you’re building it. Once you’ve selected everything you want to include in your menu, it’s time to start organizing it.
Organize Your Menu’s Structure
This is arguably the easiest part of setting up your WordPress menus. Organizing your menu items is as simple as dragging and dropping them into place.
To do so, hover over any menu item you’ve added. You’ll see your cursor turn into a crosshair. From here, simply drag and drop the item up or down to reorder it:
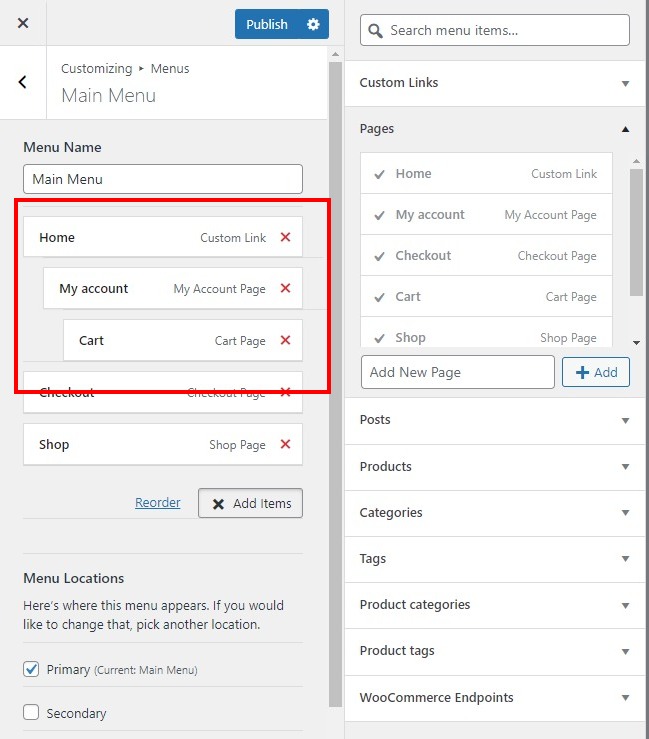
If you’d like to create a menu hierarchy using submenus, you can do that here as well. Just drag an item to the right, and it will automatically become a sub-element of the menu item right above it.
When you’re ready to move on, click on the Publish button at the top of the page to preserve your changes. Alternatively, you can select Save Draft or Schedule if you don’t want your new menu implemented quite yet.