When using WordPress hosting, installing WooCommerce is rather simple. You must ensure that the server requirements are satisfied to ensure the plugin’s proper operation.
On a related point, if you have not yet installed WordPress, consider this article.
Let’s get started with WooCommerce plugin Installation
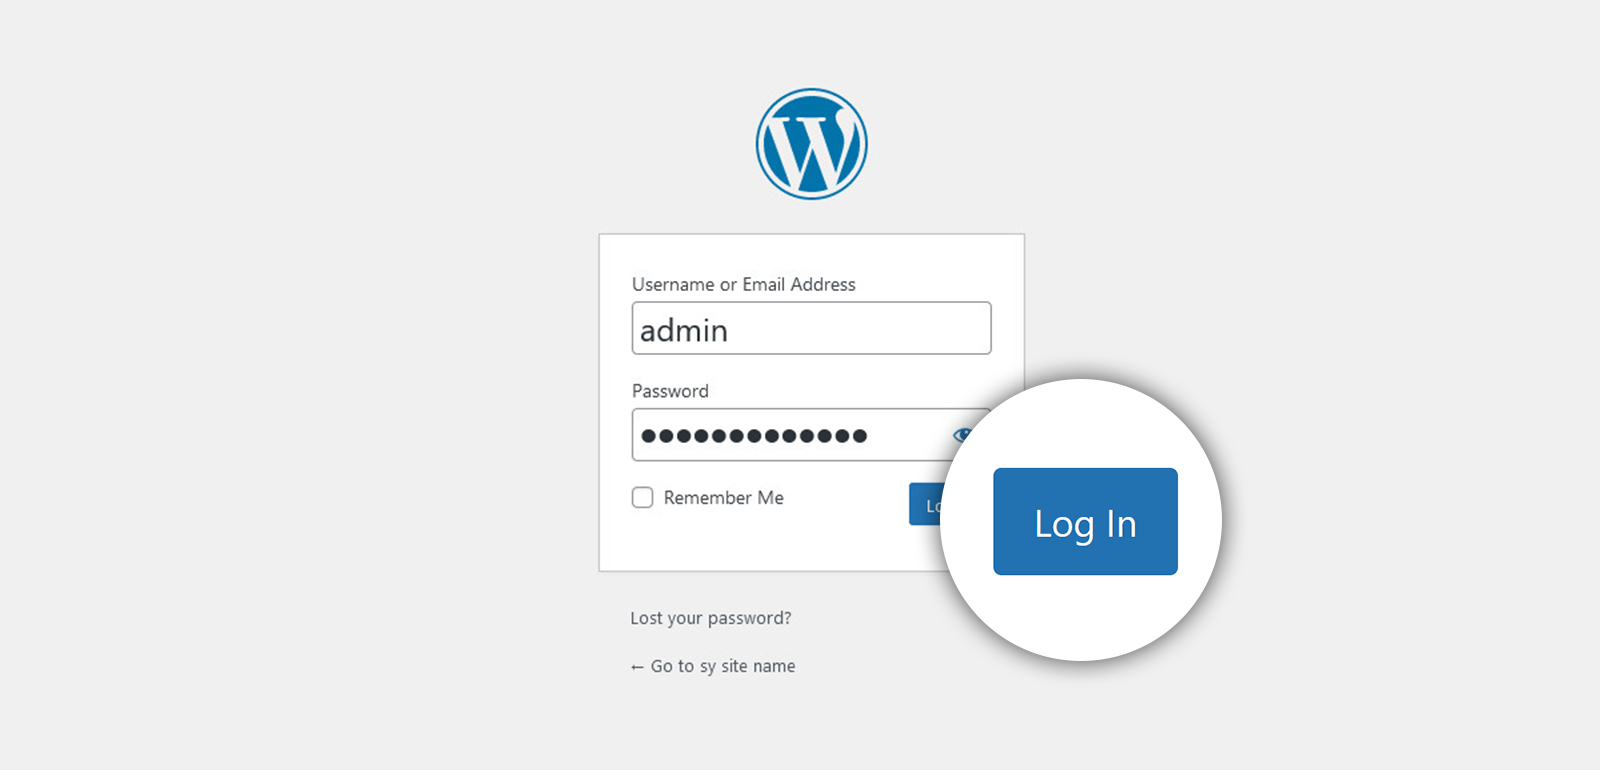
1. Access Your WordPress Admin
To install WooCommerce plugin, you must first log in to your WordPress administration panel.
The left-hand side of the WordPress admin panel has various different settings. By using the following path, you can access the plugin installation page:
Find Plugins and then Add New.
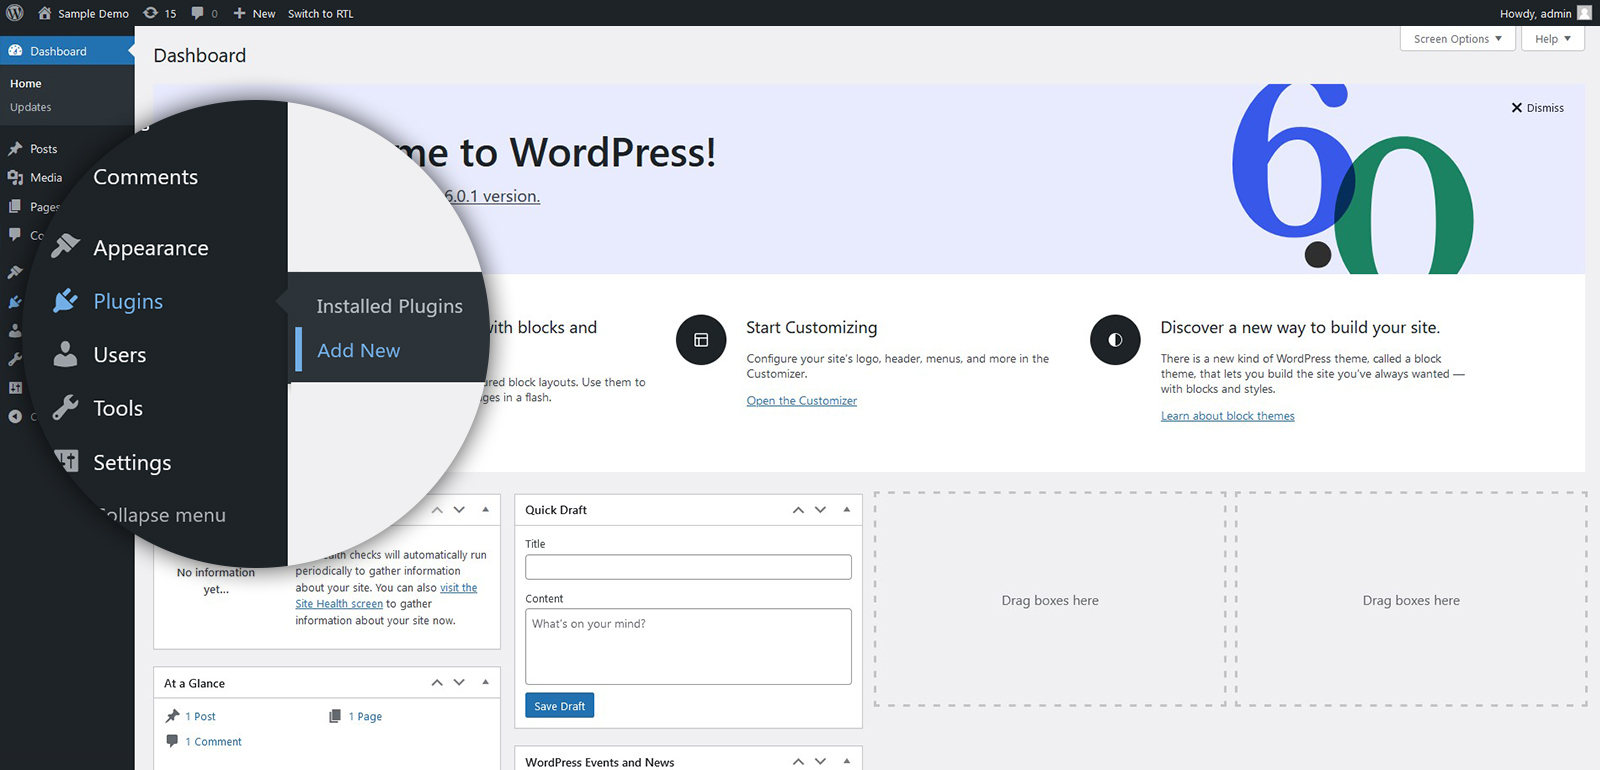
When you click the Add New button, a screen that says ‘Add Plugins‘ will appear.
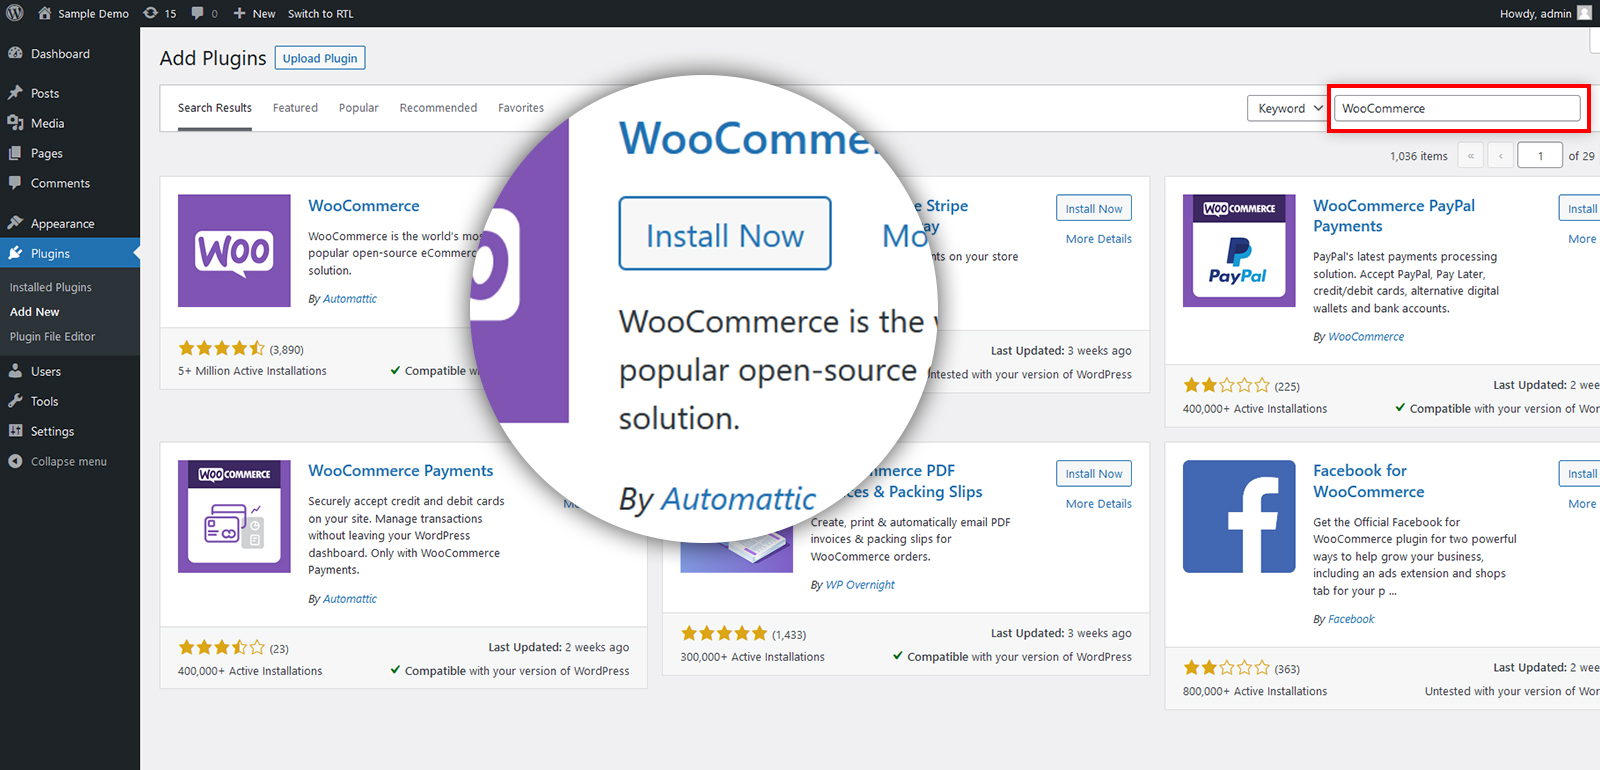
In the search box, type “WooCommerce” and press Enter.
WooCommerce appears at the top of the list of results when you do a search.
Select the Install Now option.
What comes next after install WooCommerce plugin?
Before a WordPress plugin can be put to use, however, it must first go through one last process.
It is necessary to activate the plugin.
When the installation procedure is complete, you can click the Activate button (The Install Now button automatically changes to Activate).
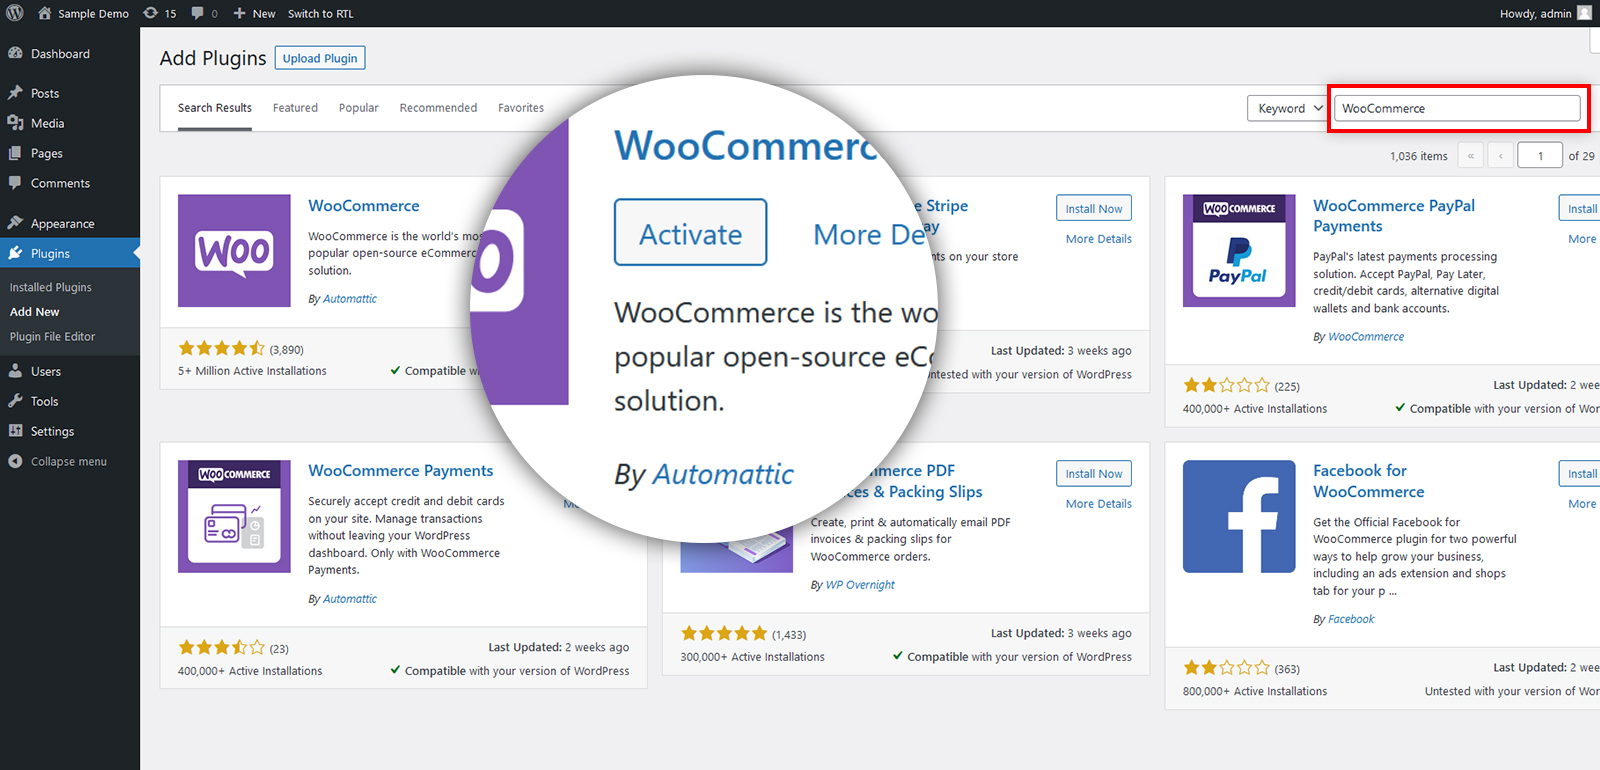
Following activation, WooCommerce will start the setup procedure.
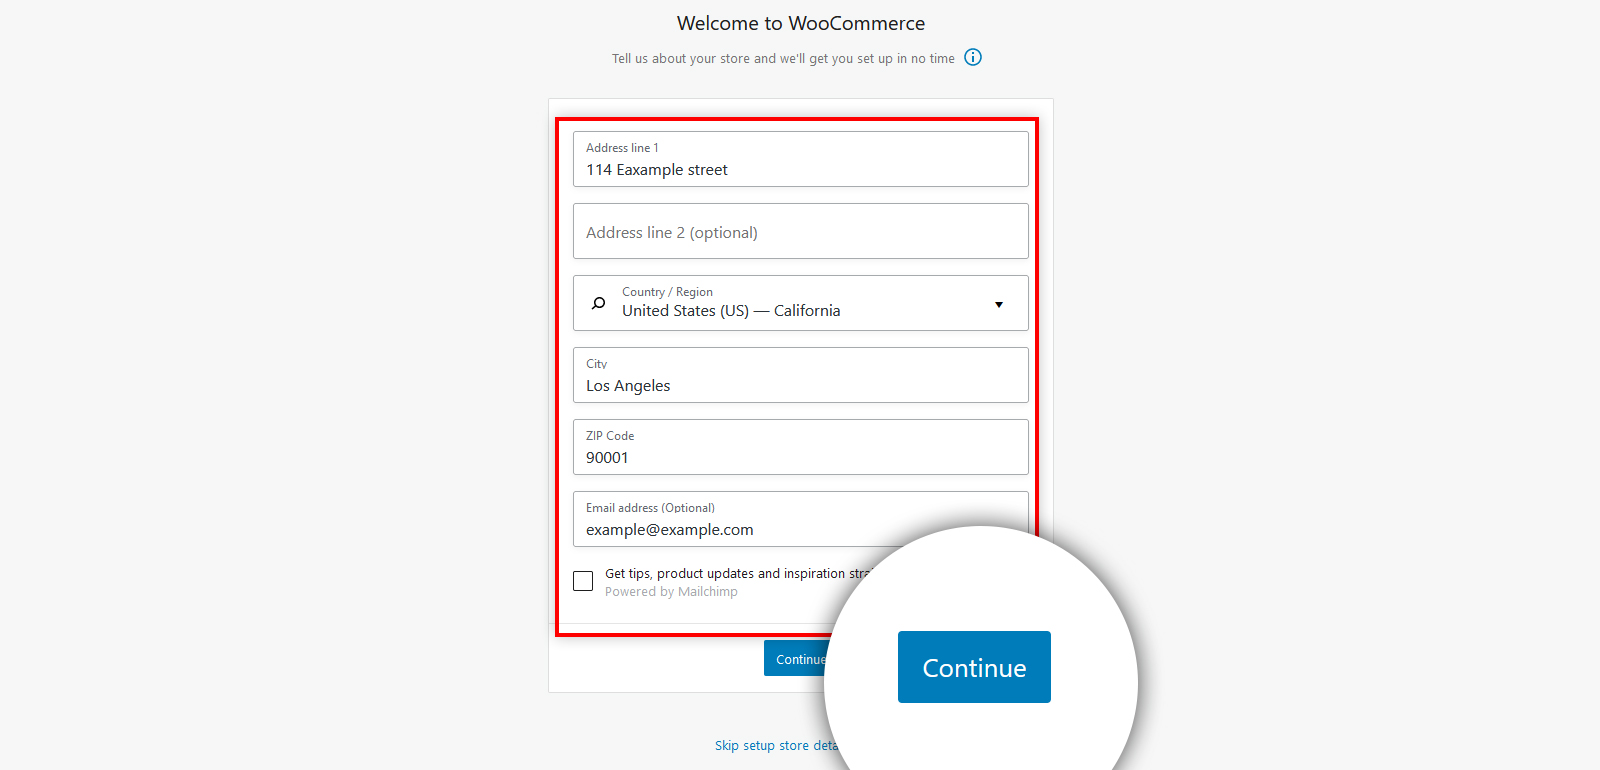
The first thing that you will need to do is input the location of your shop. After that, just click the ‘Continue’ option to get on with the process.
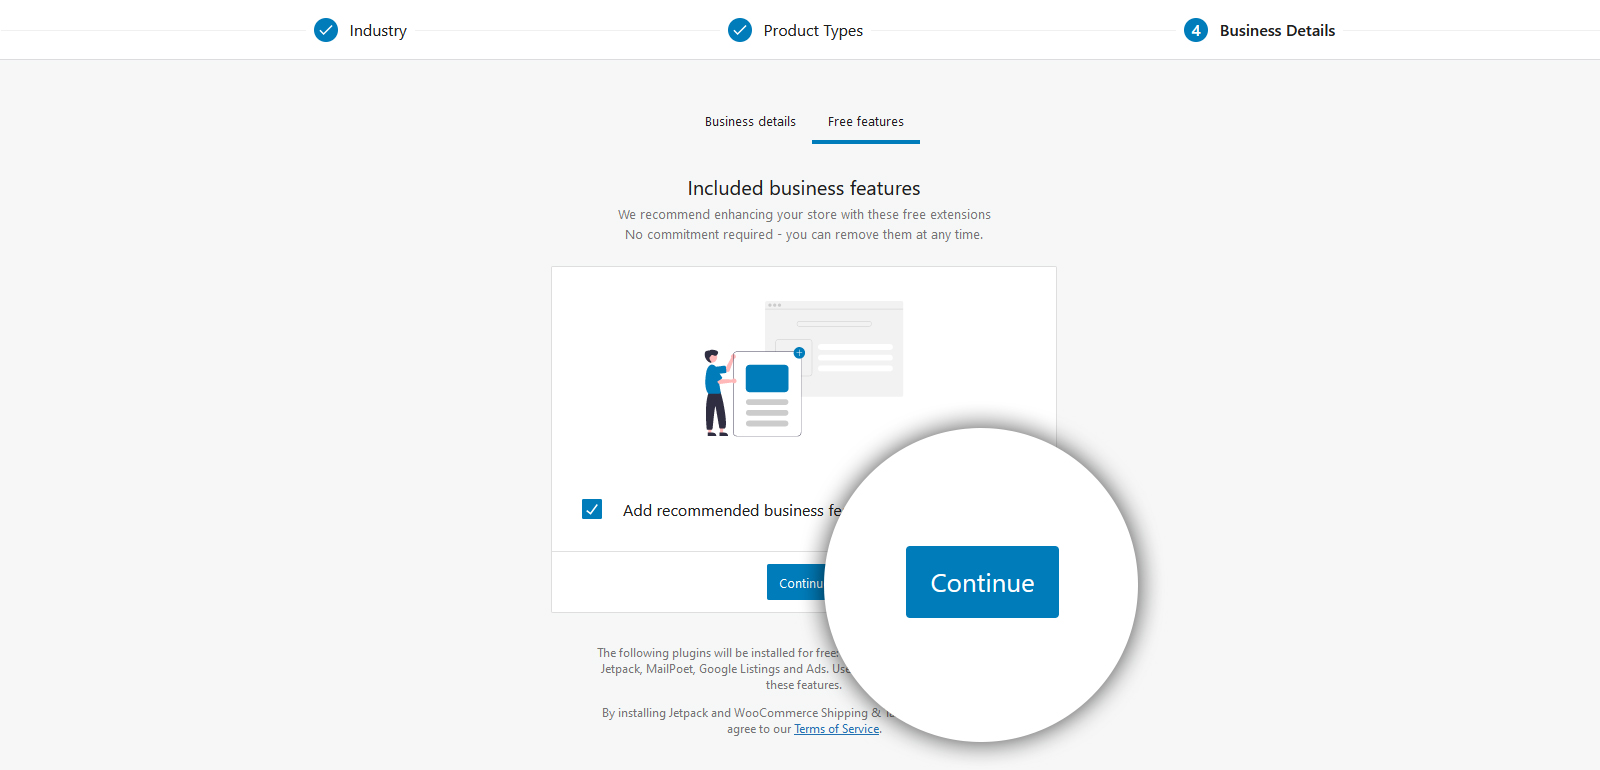
In the subsequent phases, you must provide your industry, product type, and other business-related information.
Additionally, the setup procedure will ask whether you like to add suggested business features to your shop. Since they are free, you may decide whether or not to install them and then click the option labeled “Continue.”
When it comes time to pick a WordPress theme, you have two options: change to a new theme or stick with your current one.
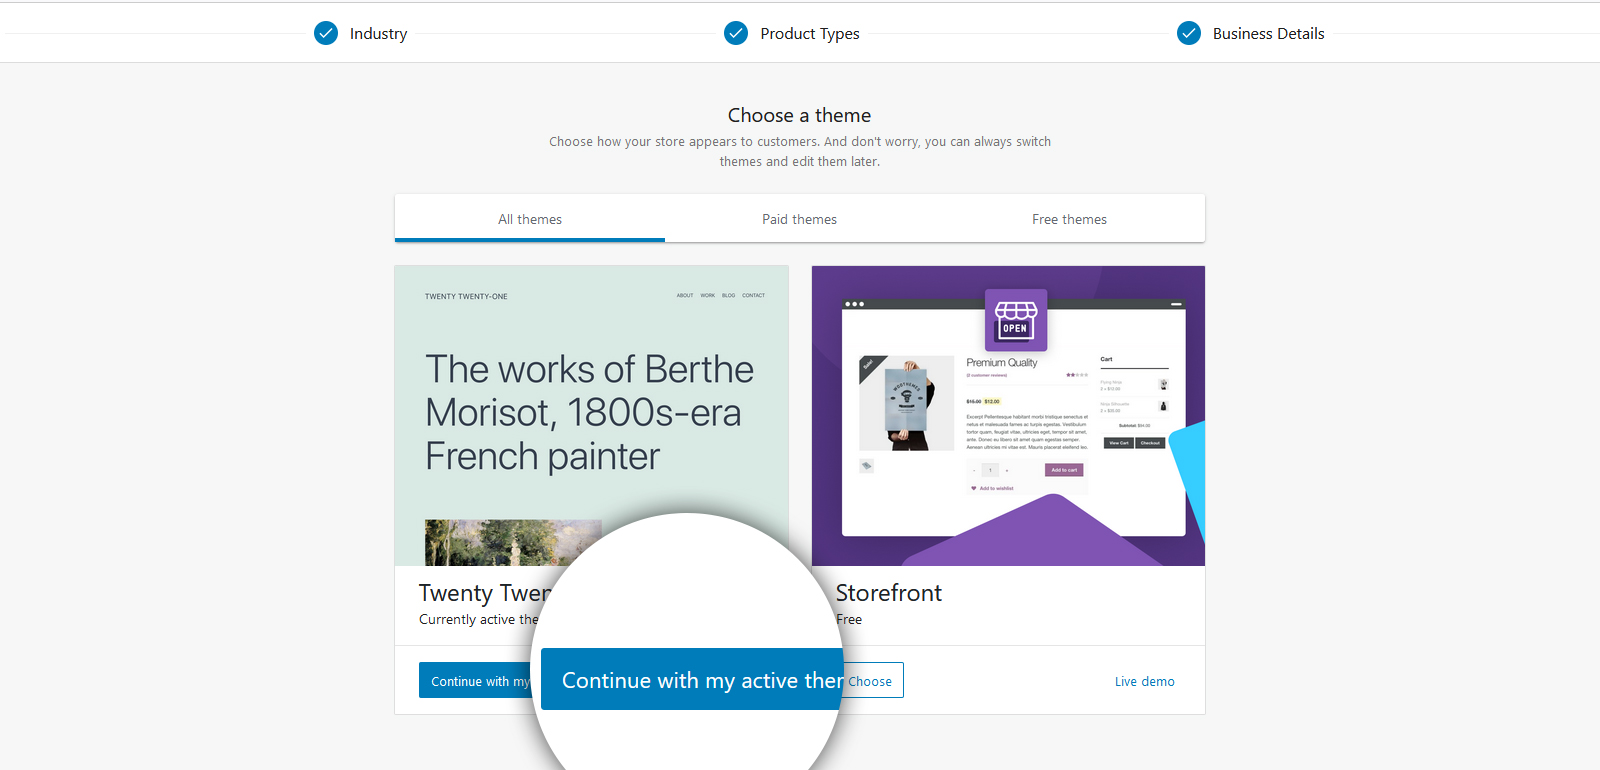
All of your WooCommerce configurations will be saved after you click the “Continue with my active theme” option in the setup process.
After that, you will be sent to the WooCommerce dashboard on your site, which is where you can complete the configuration of your online shop.
2. Configure Your WooCommerce Store
An easy-to-understand checklist of tasks is available in the WooCommerce dashboard for customizing your online business.
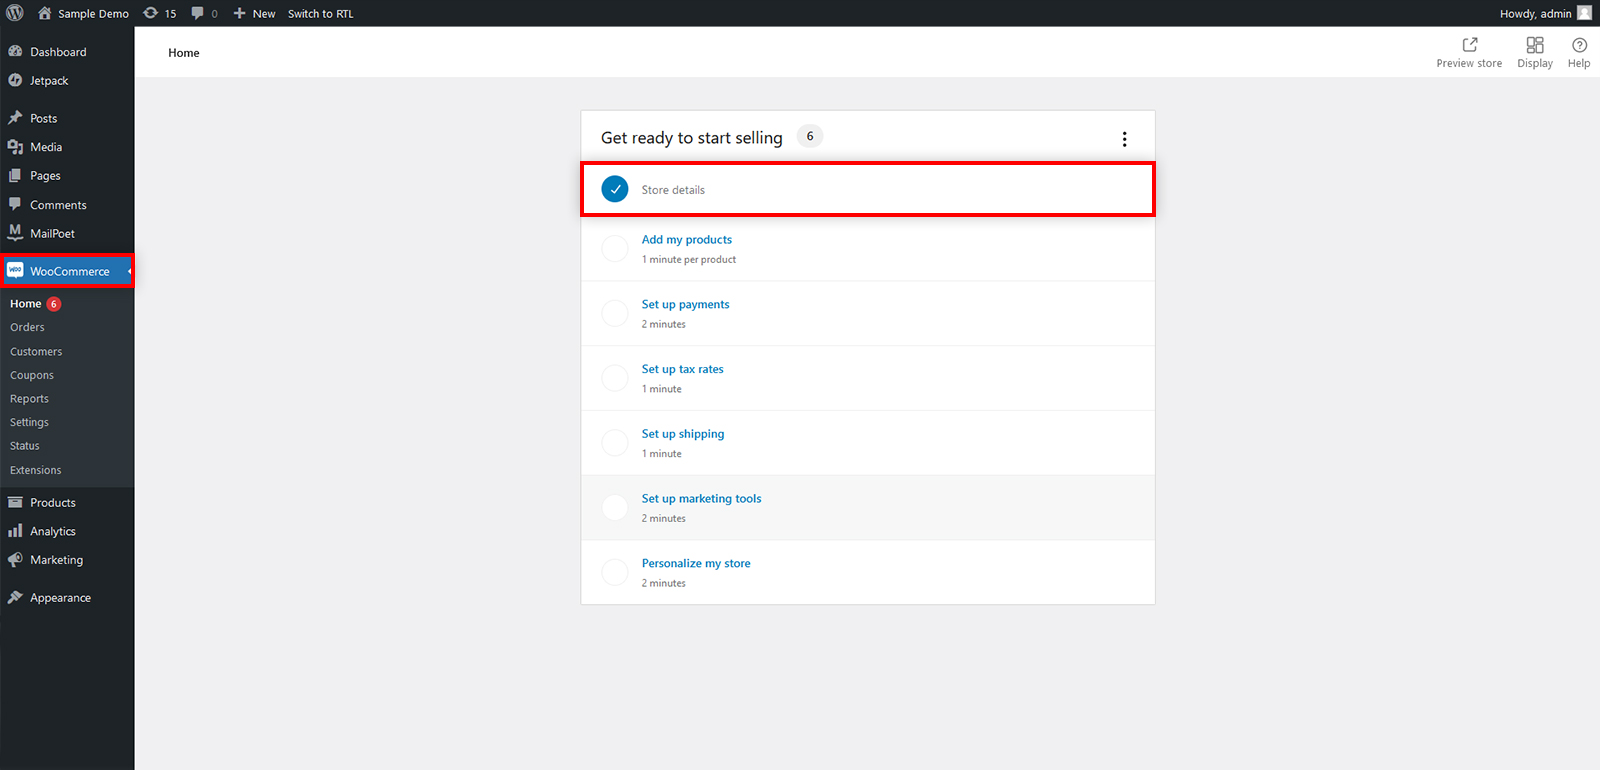
Select the “Add my products” assignment to get started.
3. Adding Items to Your WooCommerce Store
Adding products to your business is a breeze using WooCommerce. You have the option of adding your first product with the help of a template, adding it manually, importing it using CSV, or importing it from another service.
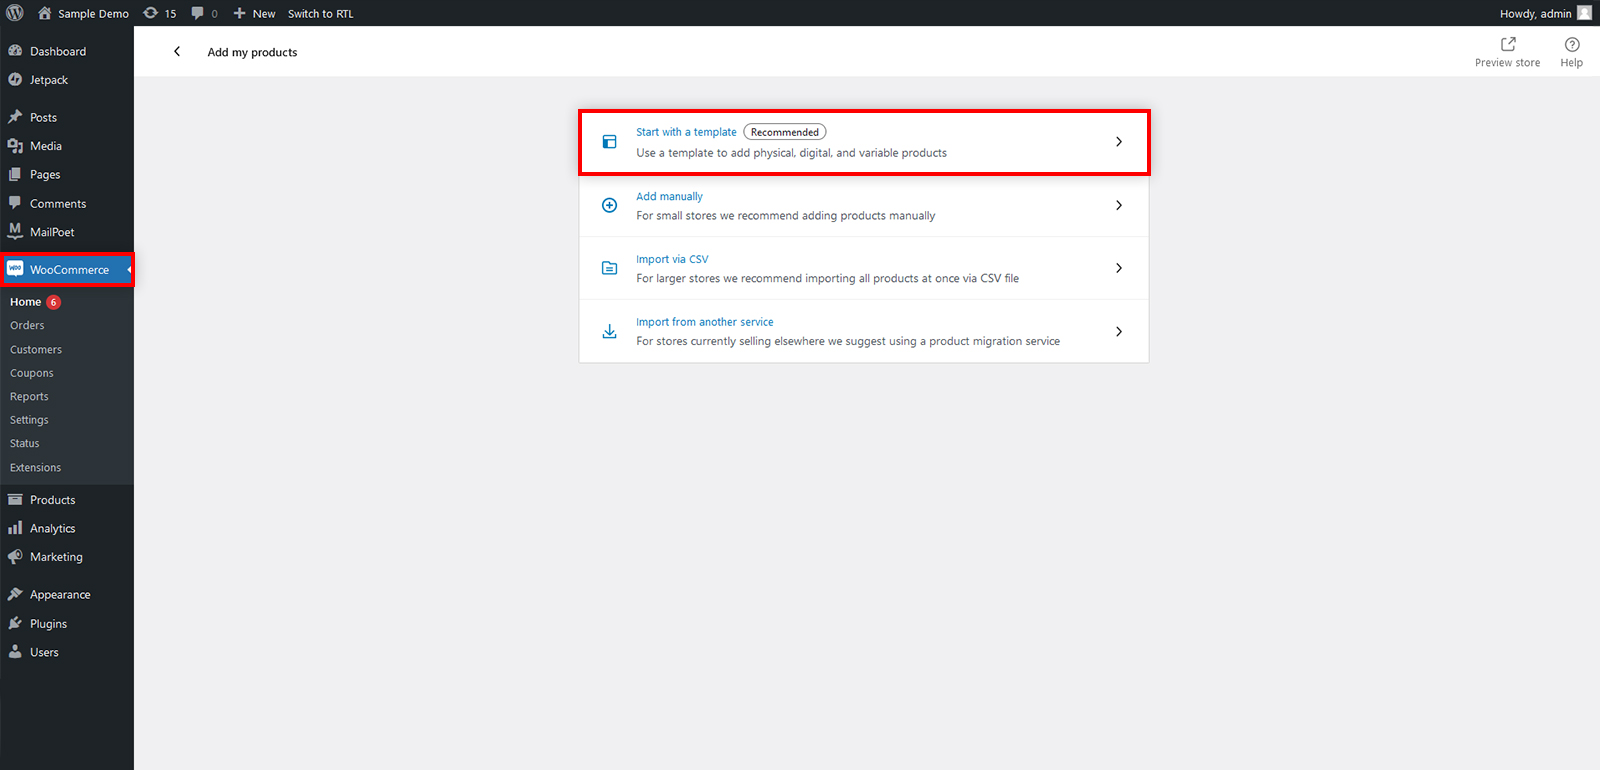
We’ll demonstrate how to add a product using a template in this article.
After that, you will be able to pick a template for either a digital product, a variable product, or a physical product.
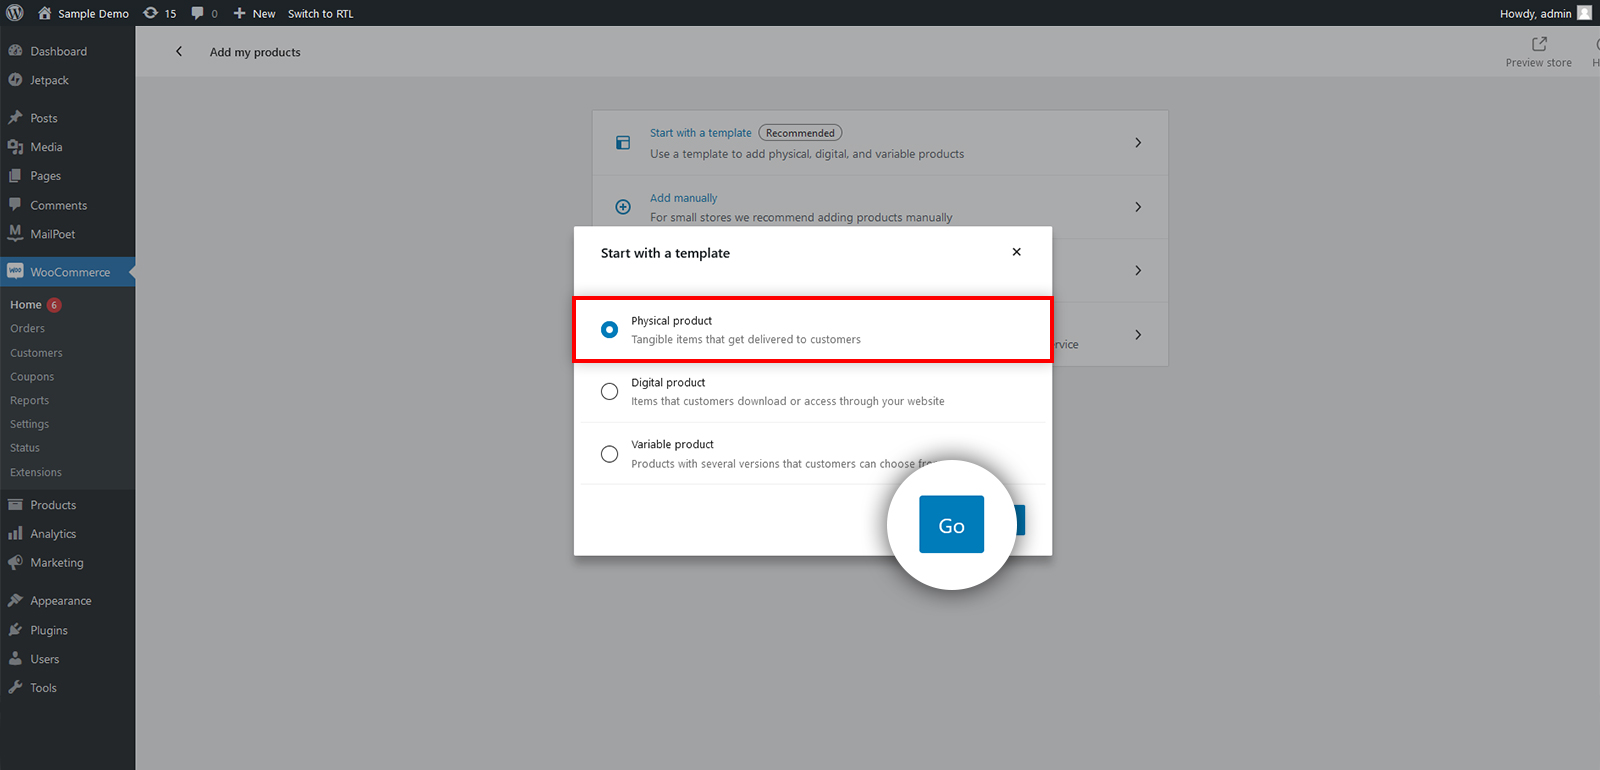
Clicking the ‘Go’ button will take you to the product editor, where you may make changes to your design.
4. Add Products to your WooCommerce store
You also have the option of adding new items by navigating to the Products > Add New page from the menu on your WordPress dashboard.
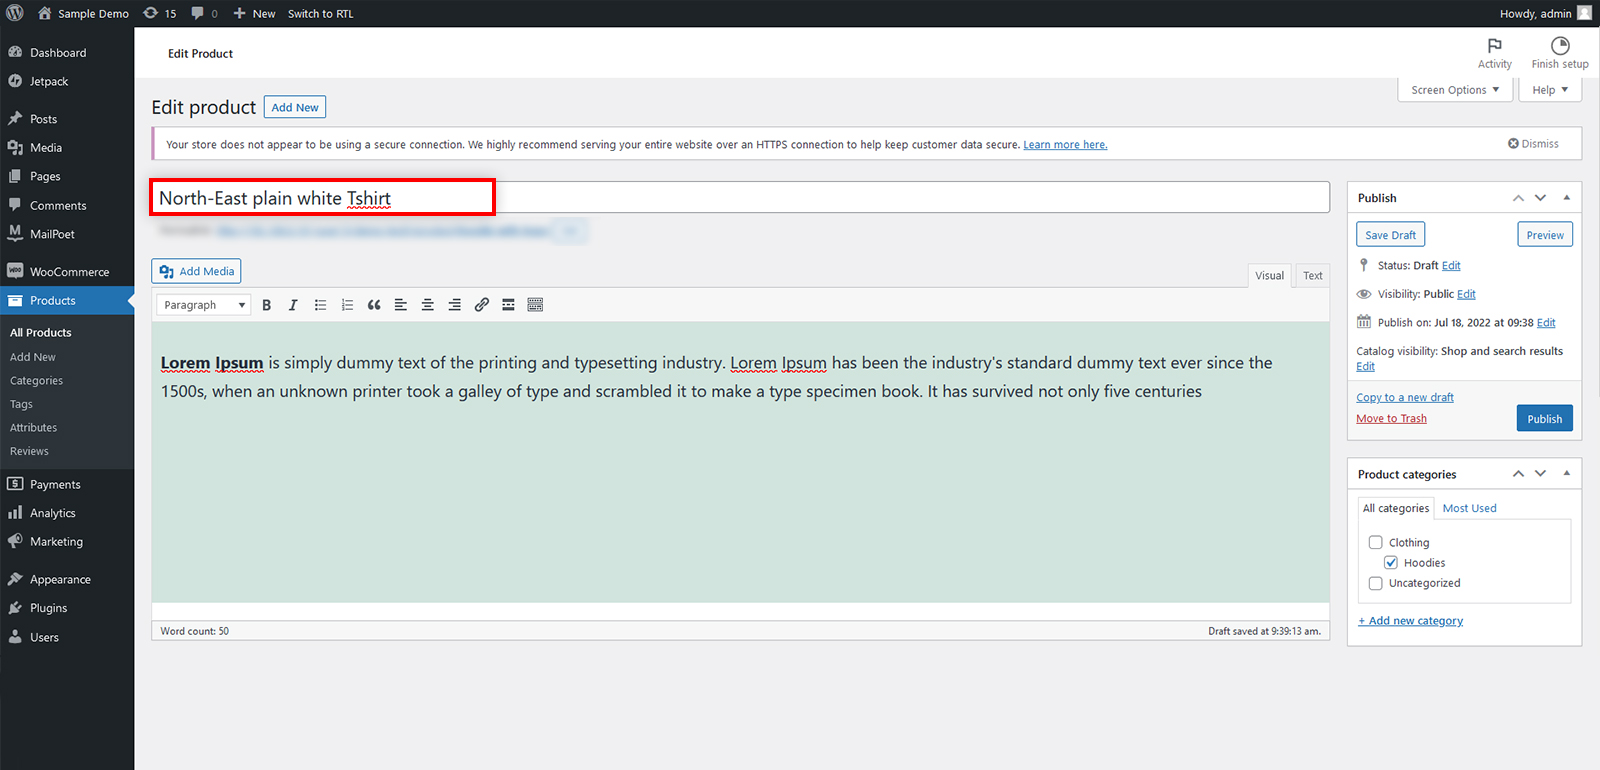
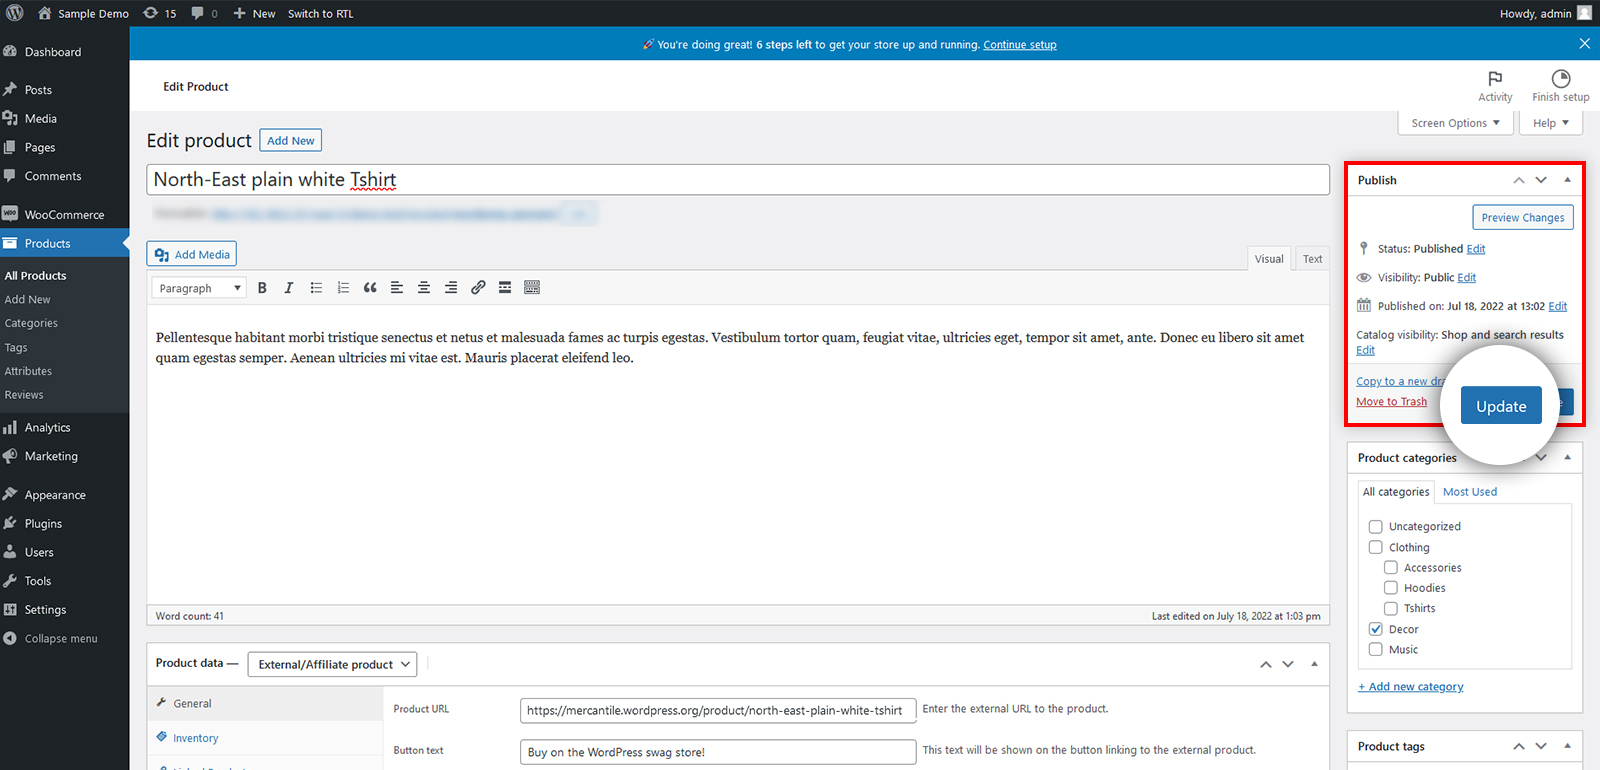
The first step is to give your product a name, followed by a brief description.
After that, choose the option labeled “Add new category” located in the column on the right. You may create a new category for the added product.

Customers may quickly and simply navigate your website’s items by using product categories.
Then, you must scroll down a little to locate the ‘Product Data’ box. You will choose the product type here, as well as enter product price, shipping charges, grouped items, and other information here.
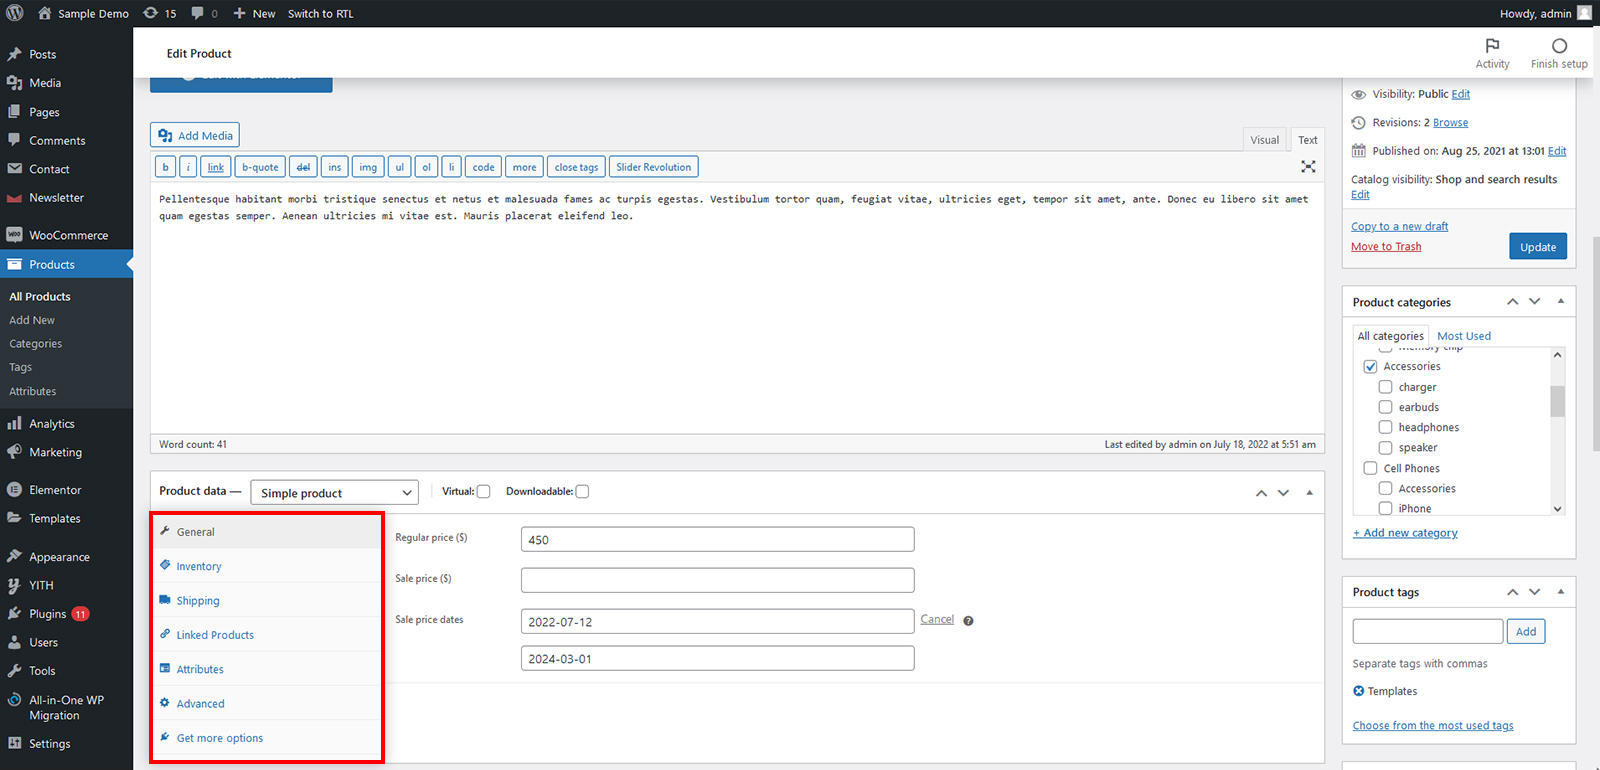
Following that, you will see a box for a product description. On various product pages throughout your website, this description will be utilized in place of the current one. You must provide a short description that is both engaging and informative in order to increase clicks.
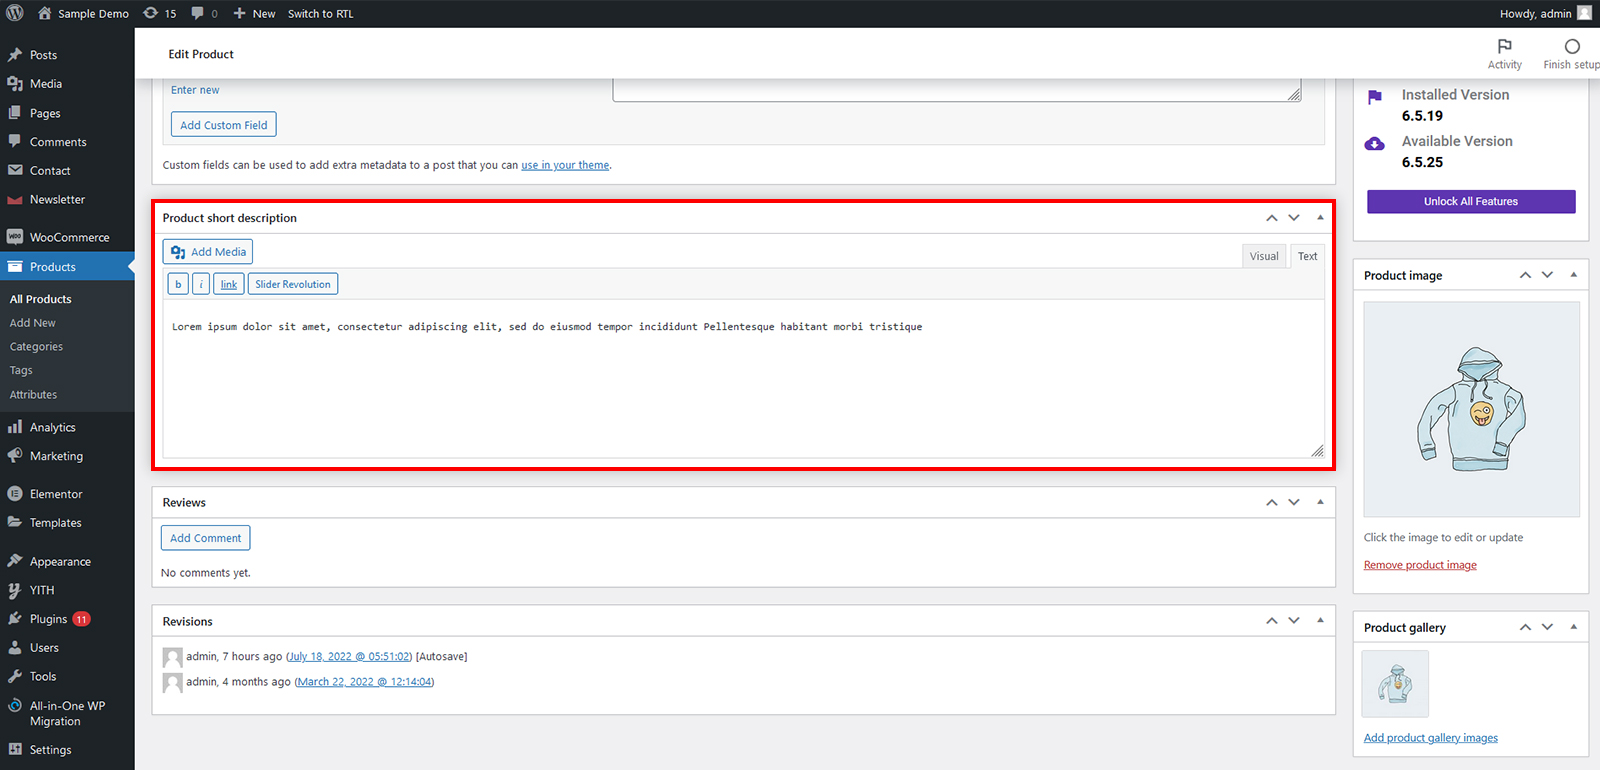
Nothing improves the usability of a product page like product photos. Adding product photos and even product image galleries to each product is a breeze with WooCommerce.
You must first upload the main product picture. This will be the main product picture shown on your store’s shop pages.

You could add additional photos below that to form a product image gallery.
Now look over all the details you’ve added so far about the product. It’s time to put this product on sale in your shop if all goes according to plan!
Publishing your product is as simple as clicking on the button labeled “Publish” on your computer’s top right-hand sidebar.
After completing this step, you may go ahead and add additional products to your website as required.
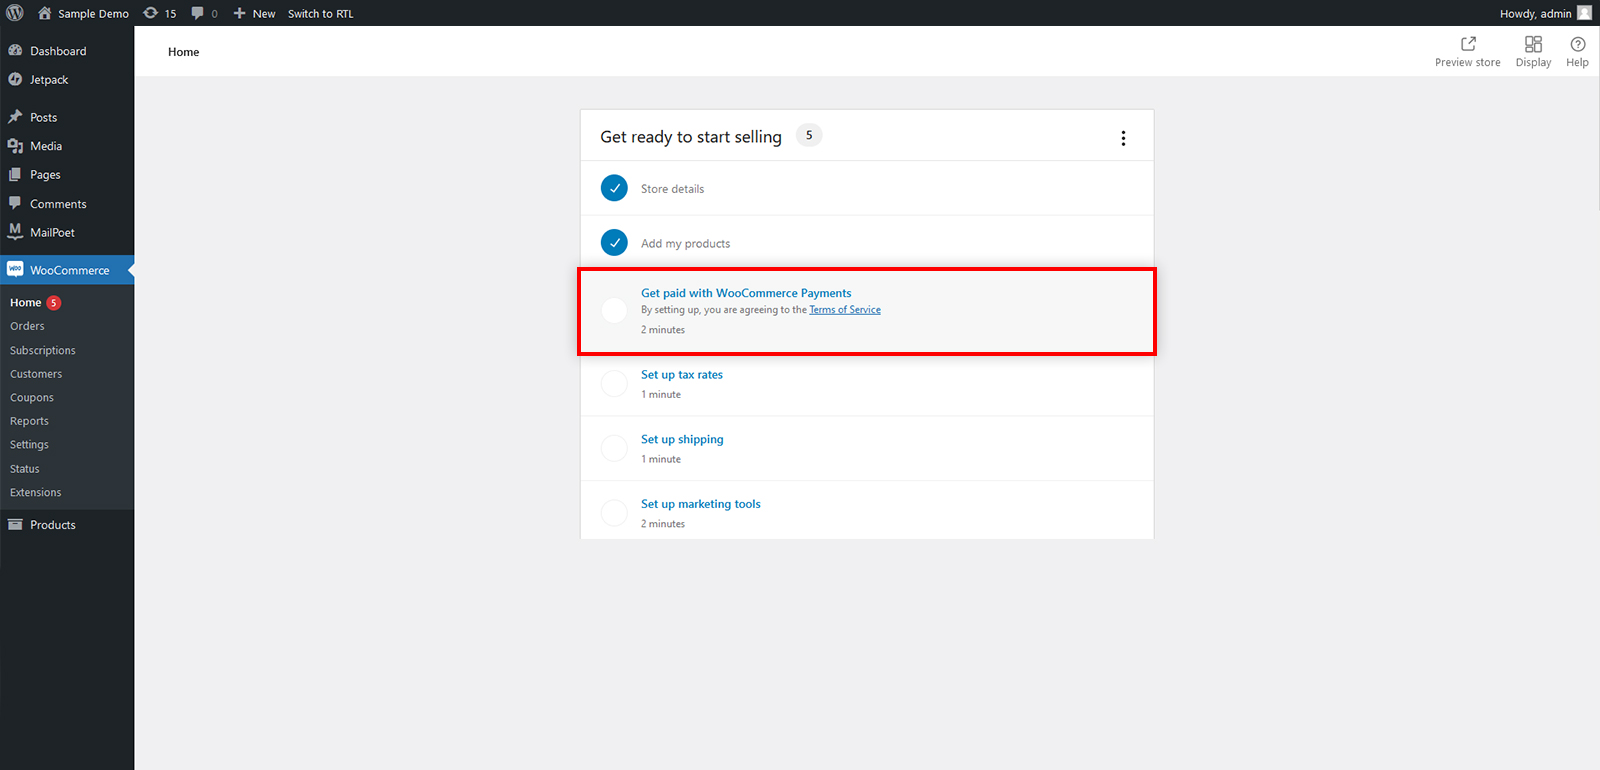
5. Configuring WooCommerce Payments
The next step is to provide payment methods so that buyers may purchase your things online.
Return to the WooCommerce > Home page to see the WooCommerce installation checklist. Click the ‘Payment setup’ option.
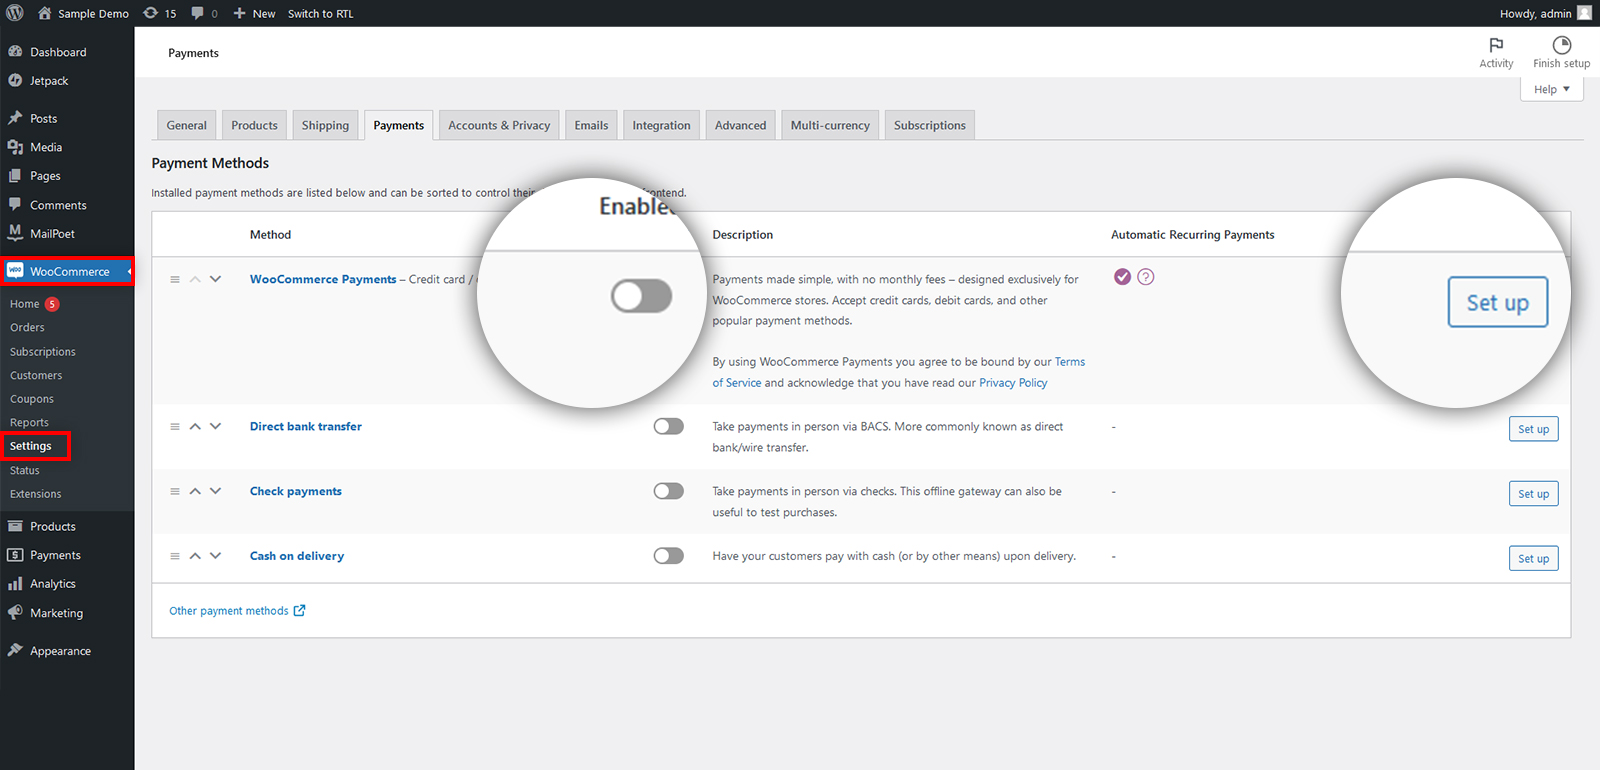
At any time in the future, you may do so using the WooCommerce » Settings » Payments section of your admin panel.
As a further step, we’ll go through setting up your tax rates.
6. Tax Configuration in WooCommerce
The next step in the WooCommerce home page setup instruction is to configure tax.
You could configure taxes using WooCommerce Tax, Avalara, or manually. Additionally, if you don’t charge sales tax, you may pick the corresponding checkbox:
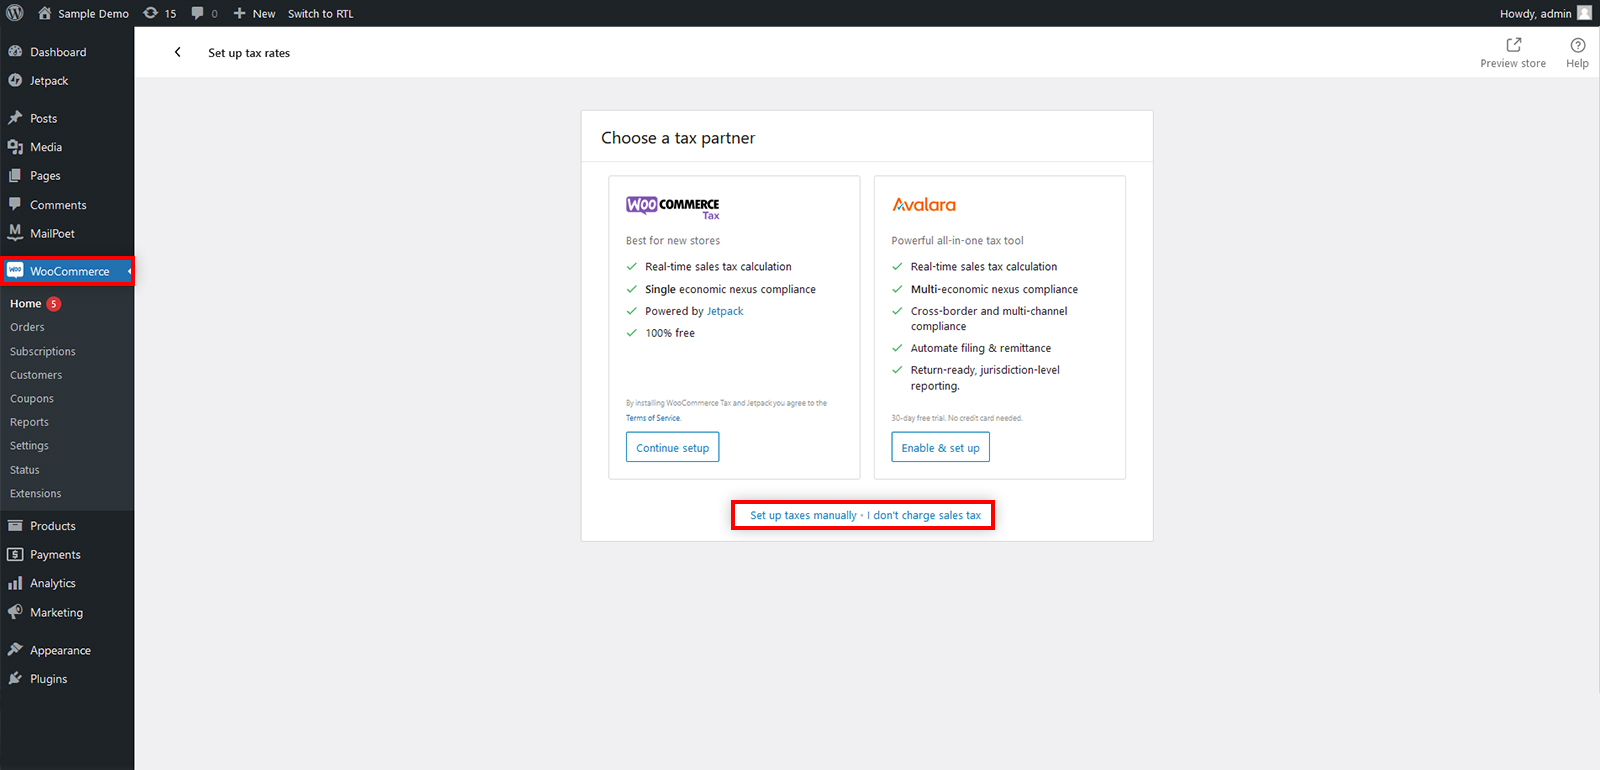
In this guide, we will demonstrate how to manually set up taxes.
Once you have selected the manual option, you will be sent to the WooCommerce » Settings » Tax menu in your admin dashboard.
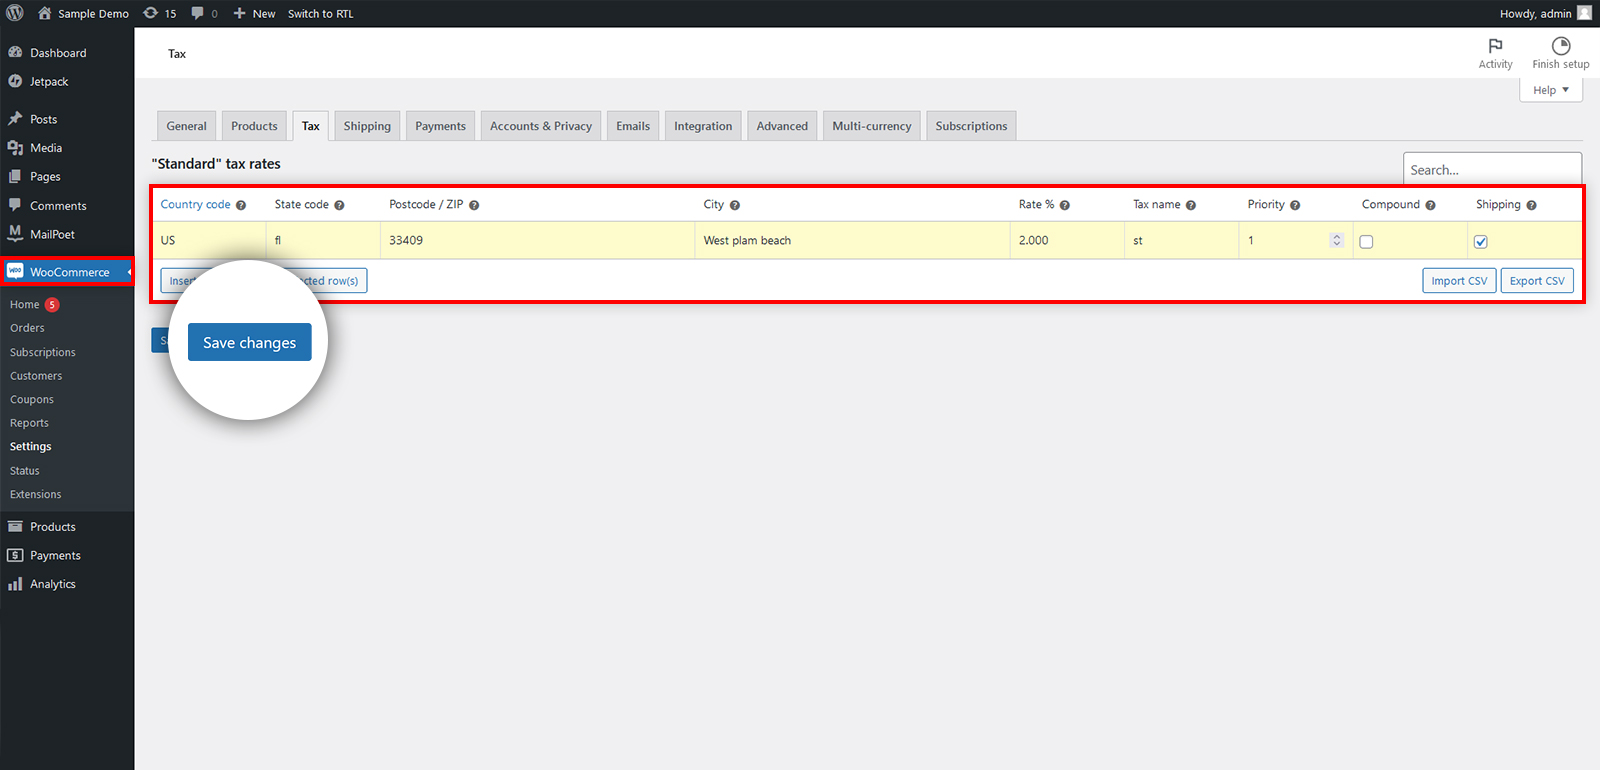
Just put in your tax information, such as your country, state, city, and zip code.
After that, input the tax rate as well as the tax name, such as sales tax or GST.
To keep your tax information safe, be sure to click the ‘Save changes’ button after you make any changes.
Configuring Shipping for WooCommerce
After that, go to the WooCommerce » Settings » Shipping tab in order to add new shipping choices.
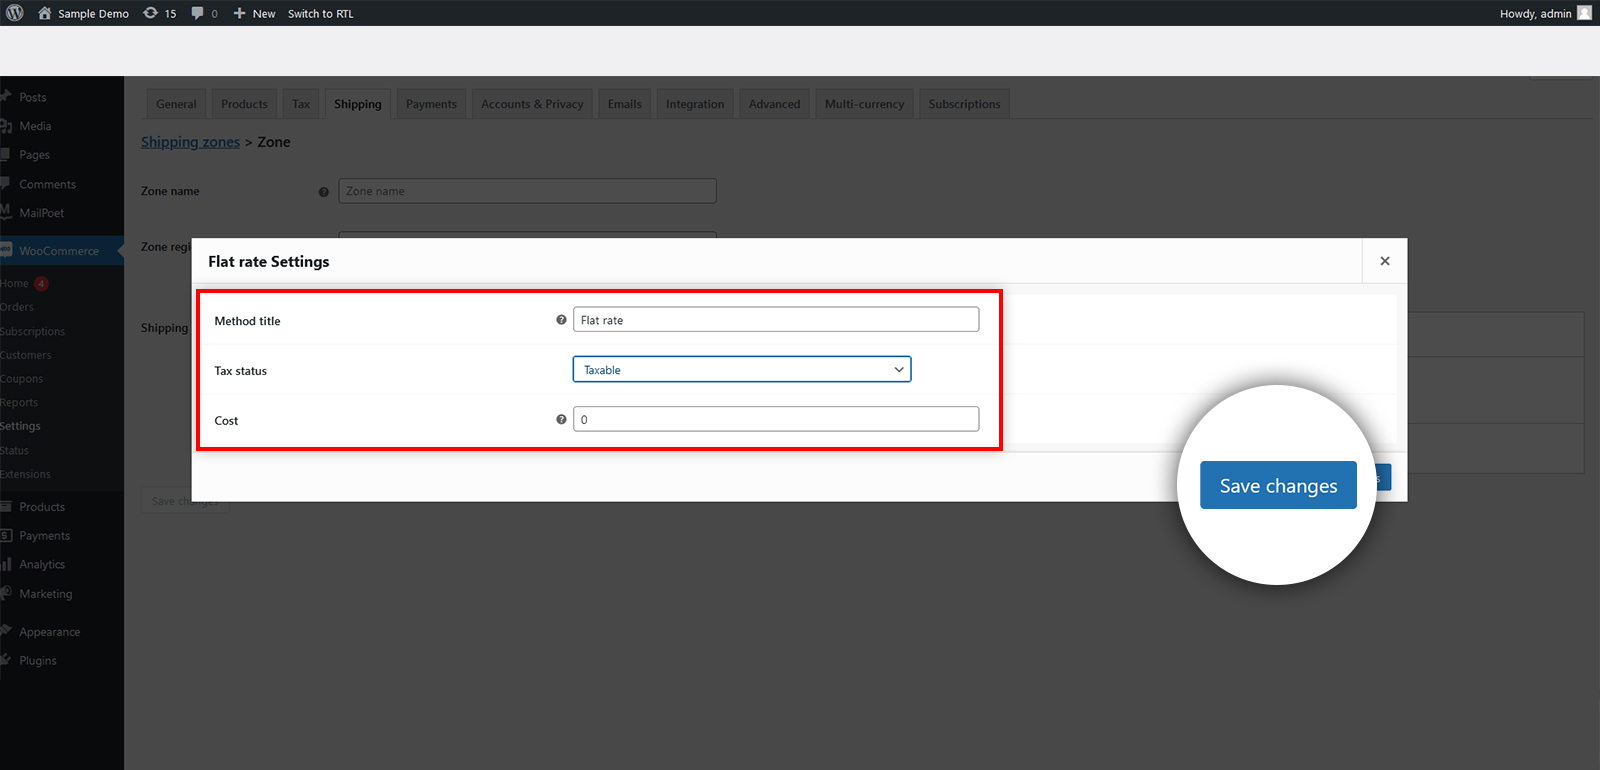
Include your shipment method and zone
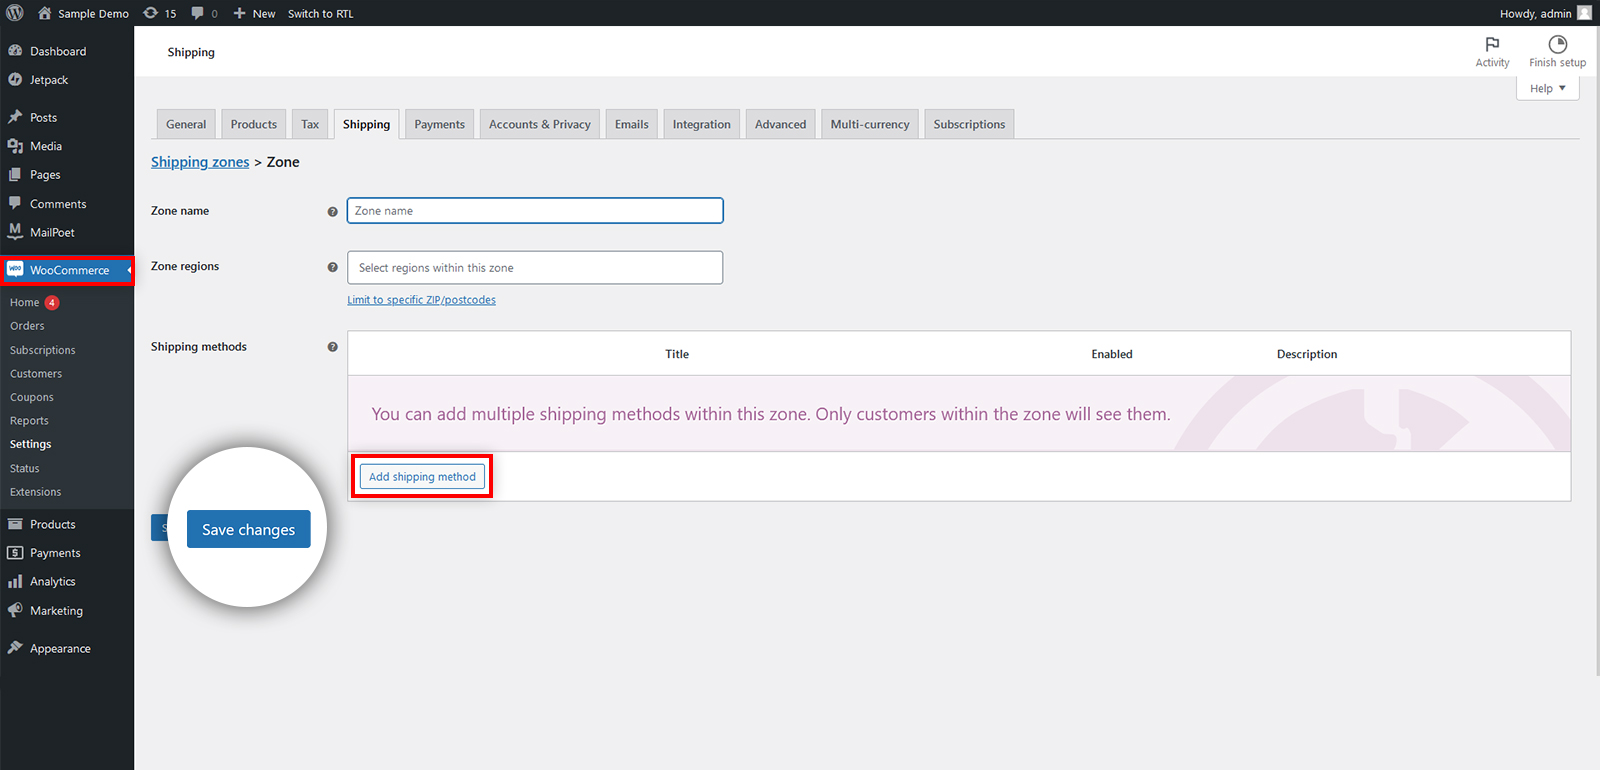
After completing the preceding step, choose “Edit.”

Then, just save your modifications.
Kudos! You’ve completed the installation of WooCommerce.Now, you can do further customization for your business site.