Our Support team is excited to share a new lesson that will become an invaluable resource for installing Woocommerce templates.
WooCommerce Theme Setup With Sample Data
This guide will walk you through the process of installing a WooCommerce theme.
If you have already installed and activated WooCommerce to your WordPress Site, then adding WooCommerce themes is an easy task for you. In case you haven’t added the WooCommerce plug, then check this article.
How To Install WooCommerce Themes?
The WooCommerce theme installation with sample product data consists of two steps:
The first step is to install a WooCommerce theme, and the next one is to upload the sample data.
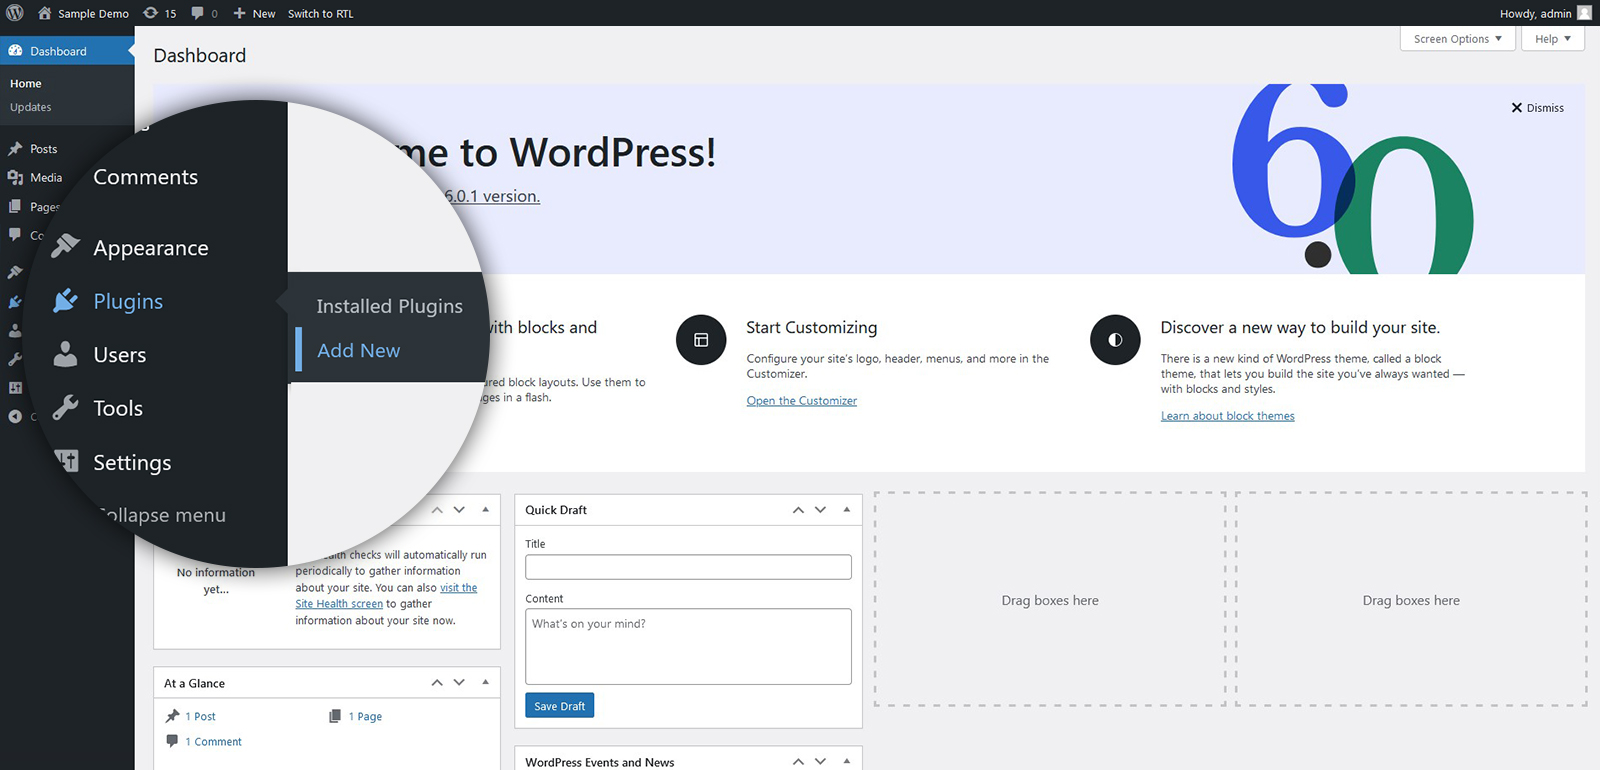
1. Access Your WordPress Admin Panel
Go to your WordPress admin dashboard and log in. (Access the admin panel by adding “/wp-admin” at the end of your site URL in the address bar)

Head to the Appearance and then Themes. To move forward, click on the Add New tab.
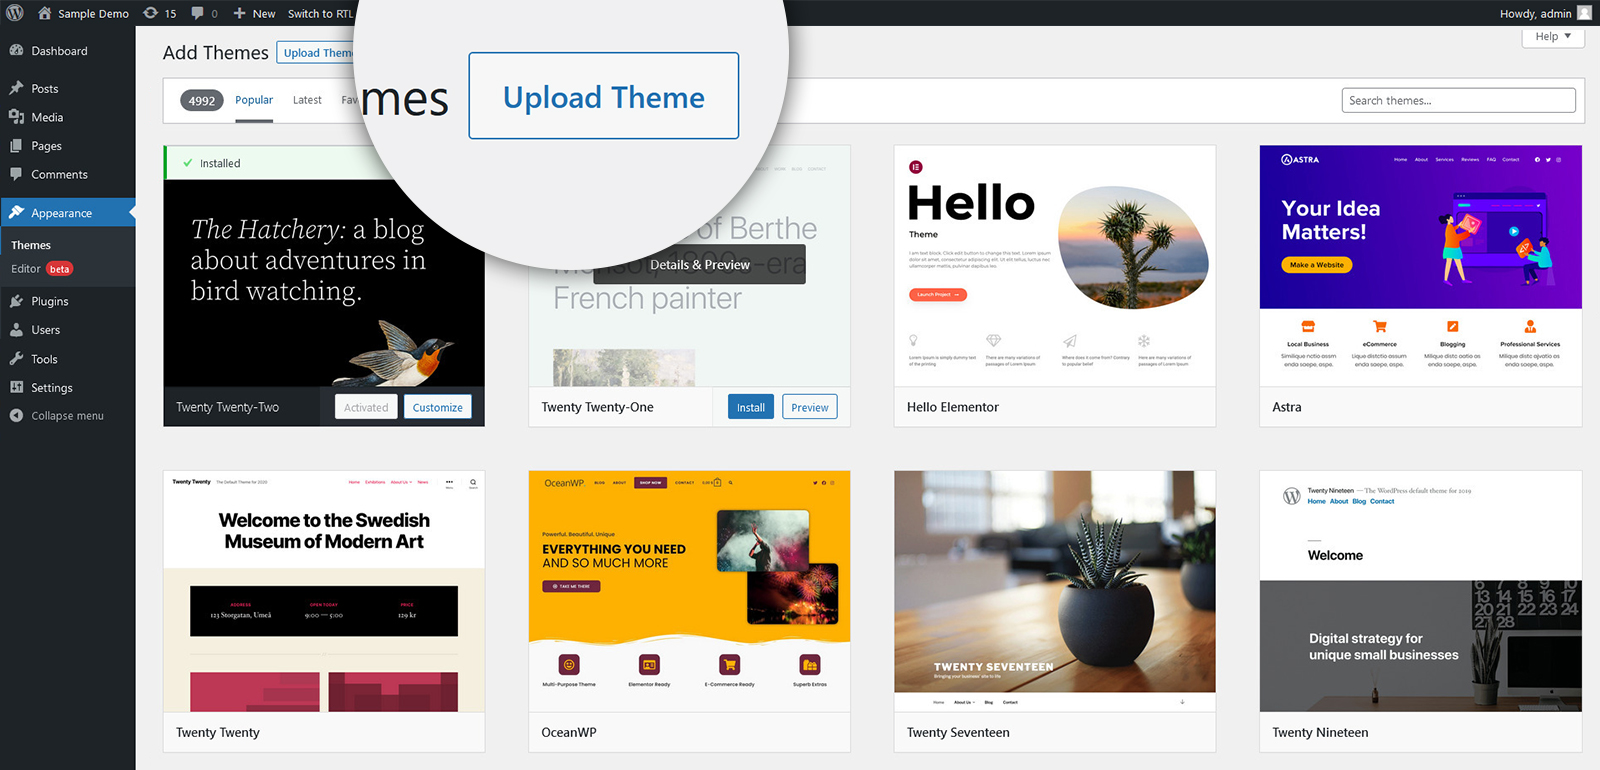
2. Upload and Install A Theme That You Have Downloaded
At this step, you can do one of two things. If you want to use a free theme, all you have to do is choose one from the list below and click “Install.” However, if you choose the premium option, you’ll have to download the theme package to your computer.
In this guide, we will walk you through the process of manually installing your theme (For the paid themes). So let’s get started!
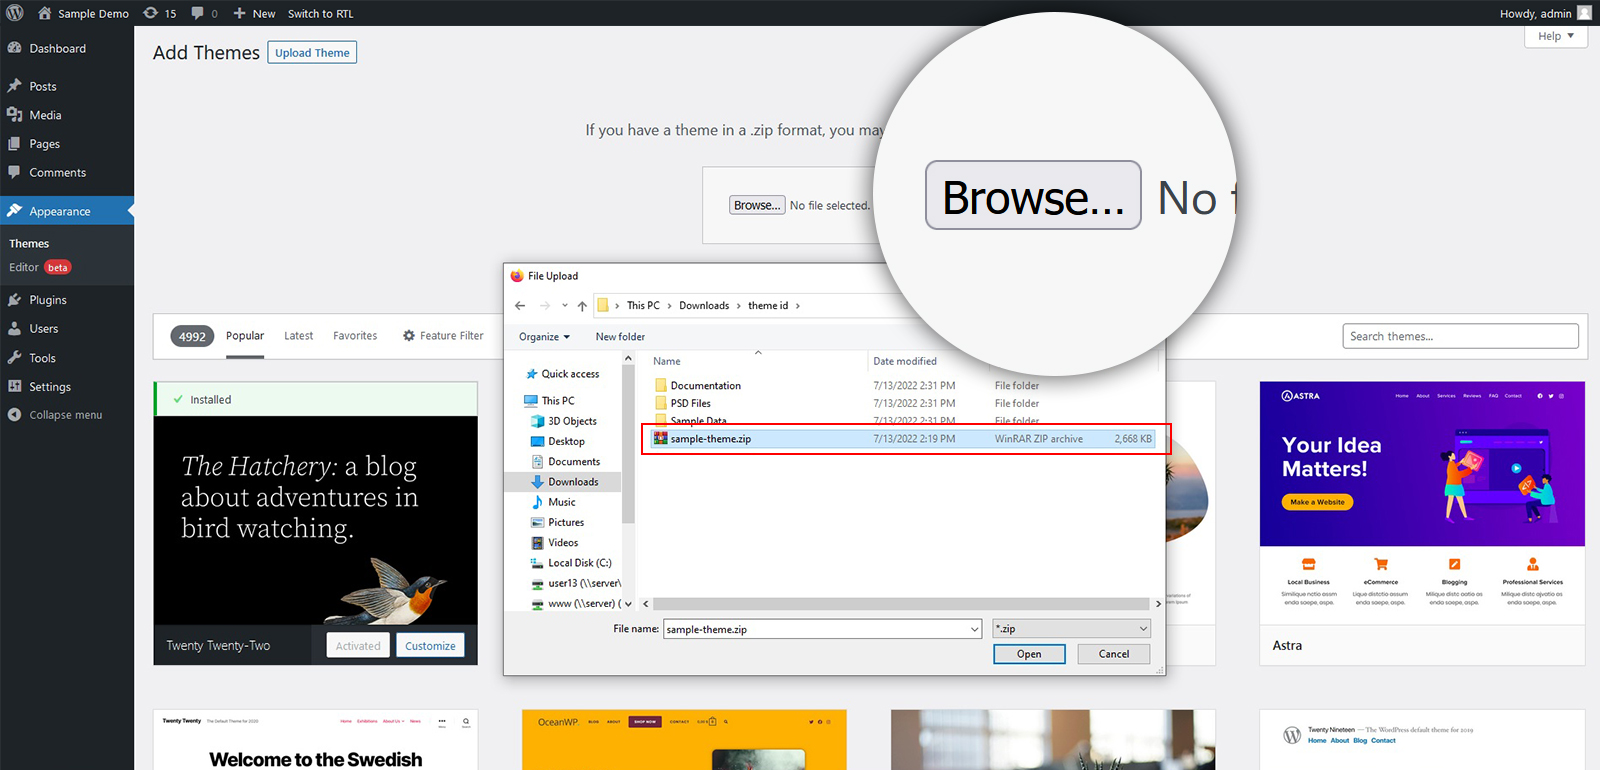
On the next screen, you will find & click the Upload theme option.
Now, navigate to the theme folder in your template bundle and open the theme’s zip file.
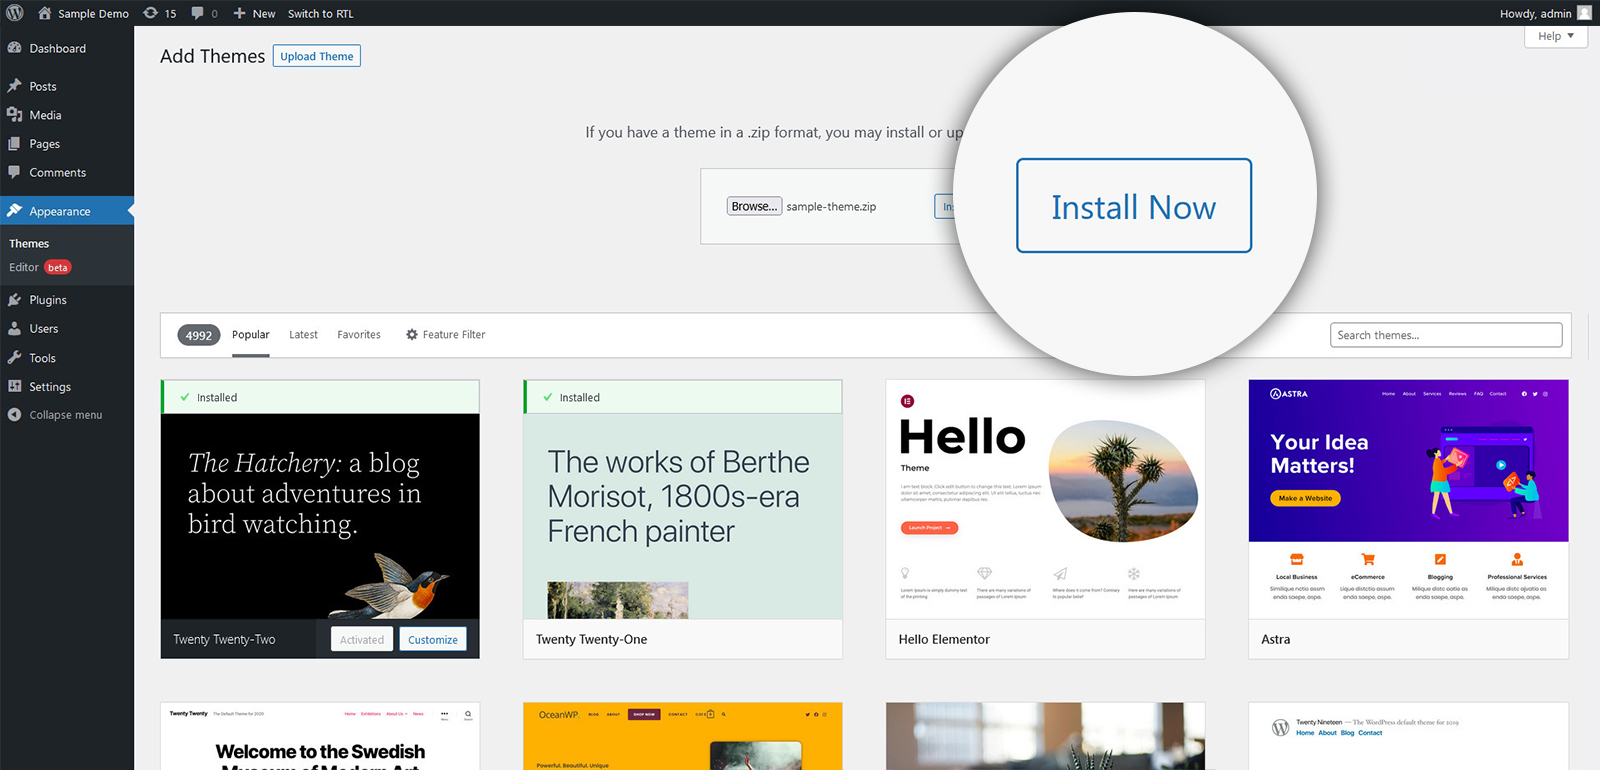
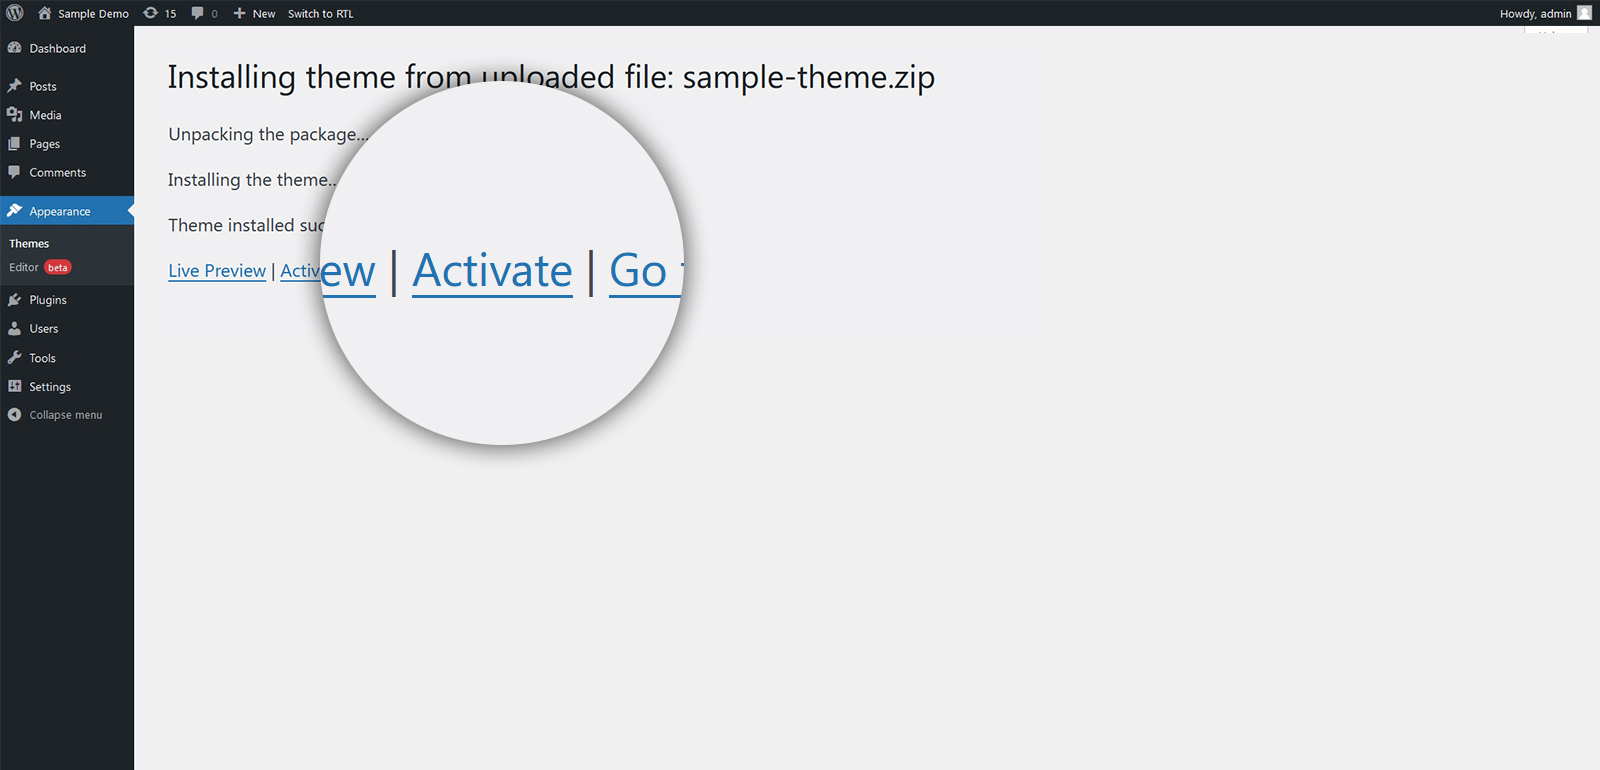
Next, simply install the theme by clicking the Install Now button.
3. Activate The Installed Theme
Now you just need to Activate the installed theme.
Now, you are all set with the WooCommerce Theme Setup and installation. However, you will see that your site does not resemble the sample template preview page. You must provide template sample data to make it seem like a demo template. To finish installing the template, follow the instructions in the following step.
How To Install Sample Data?
After installing a theme, you can proceed to install sample data. For that first you will need to find and download the sample-products.csv file.
WooCommerce sample data is stored in a file named sample-products.csv or sample- sample-products.xml, which is placed in the WooCommerce plugin folder under woocommerce/sample-data/.
Now that you’ve downloaded the sample data file, let’s load the shop with some sample product data.
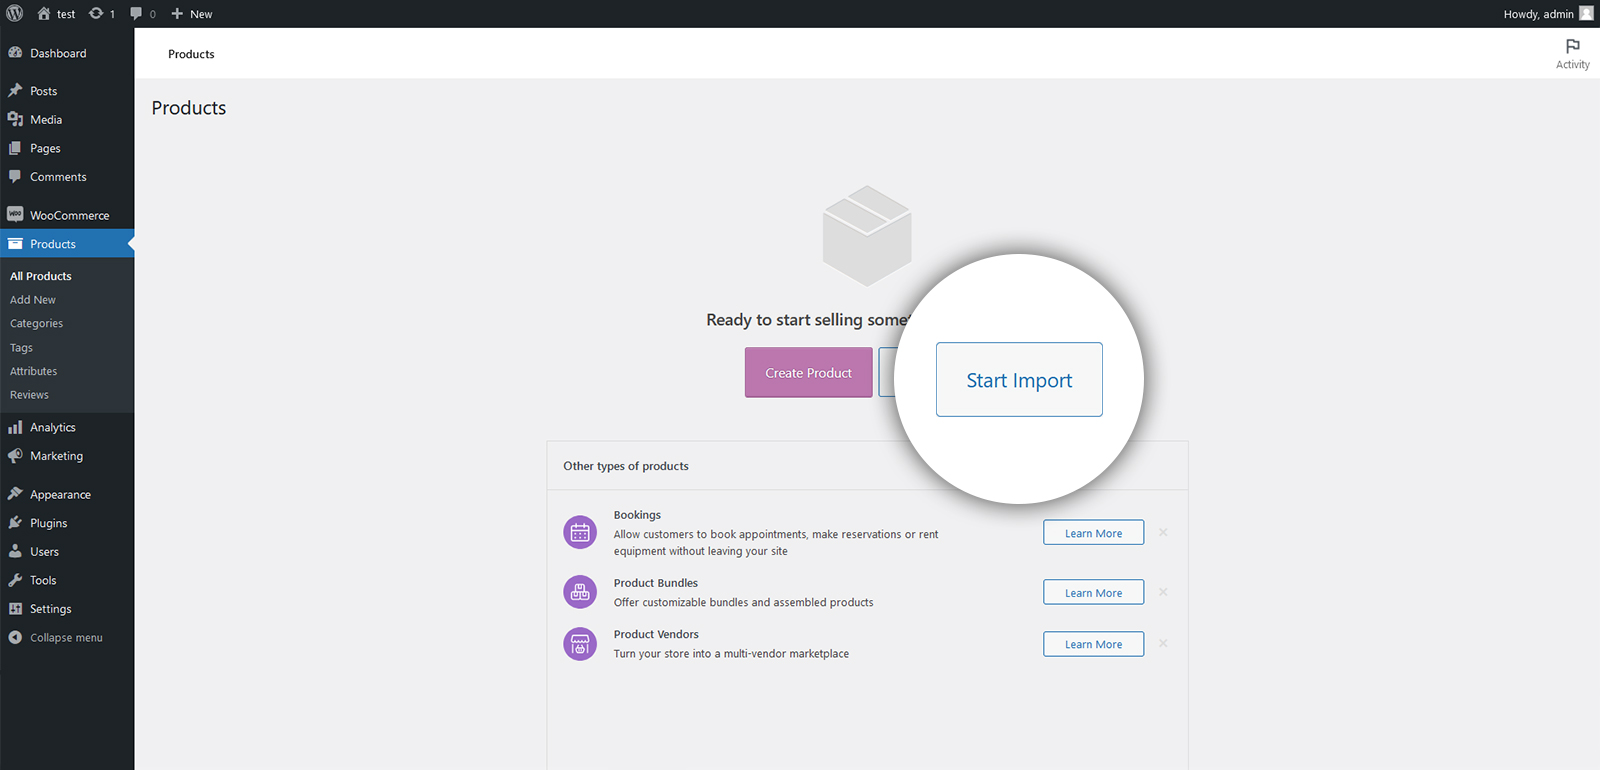
1. Visit the Product Page To Get Started
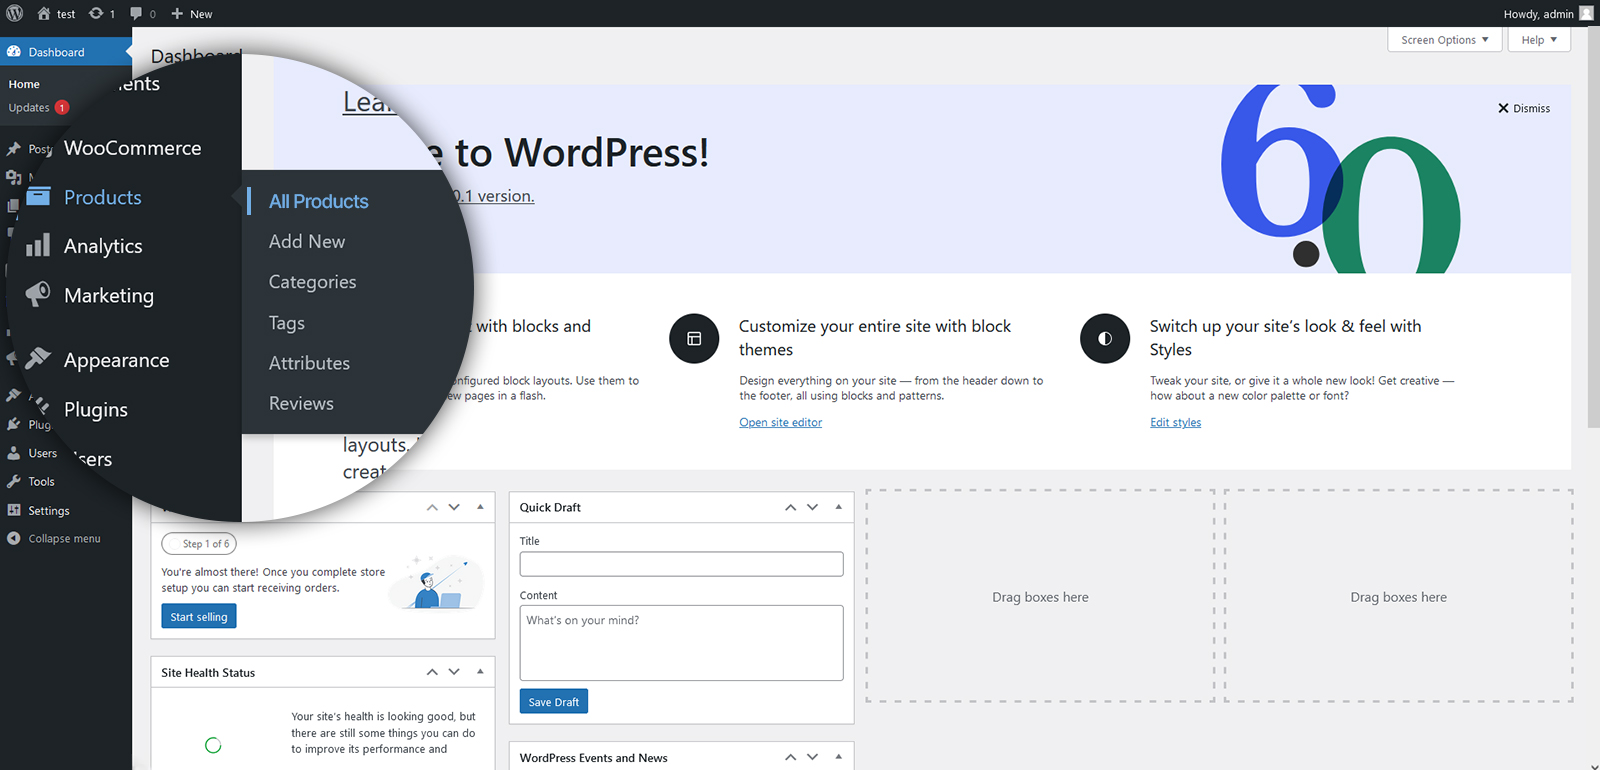
To begin, navigate to the WordPress admin section’s Products > All Products page
After that, you will be sent to the product importer page. To continue with the procedure further than this point, you will need to click the ‘Start Import button.
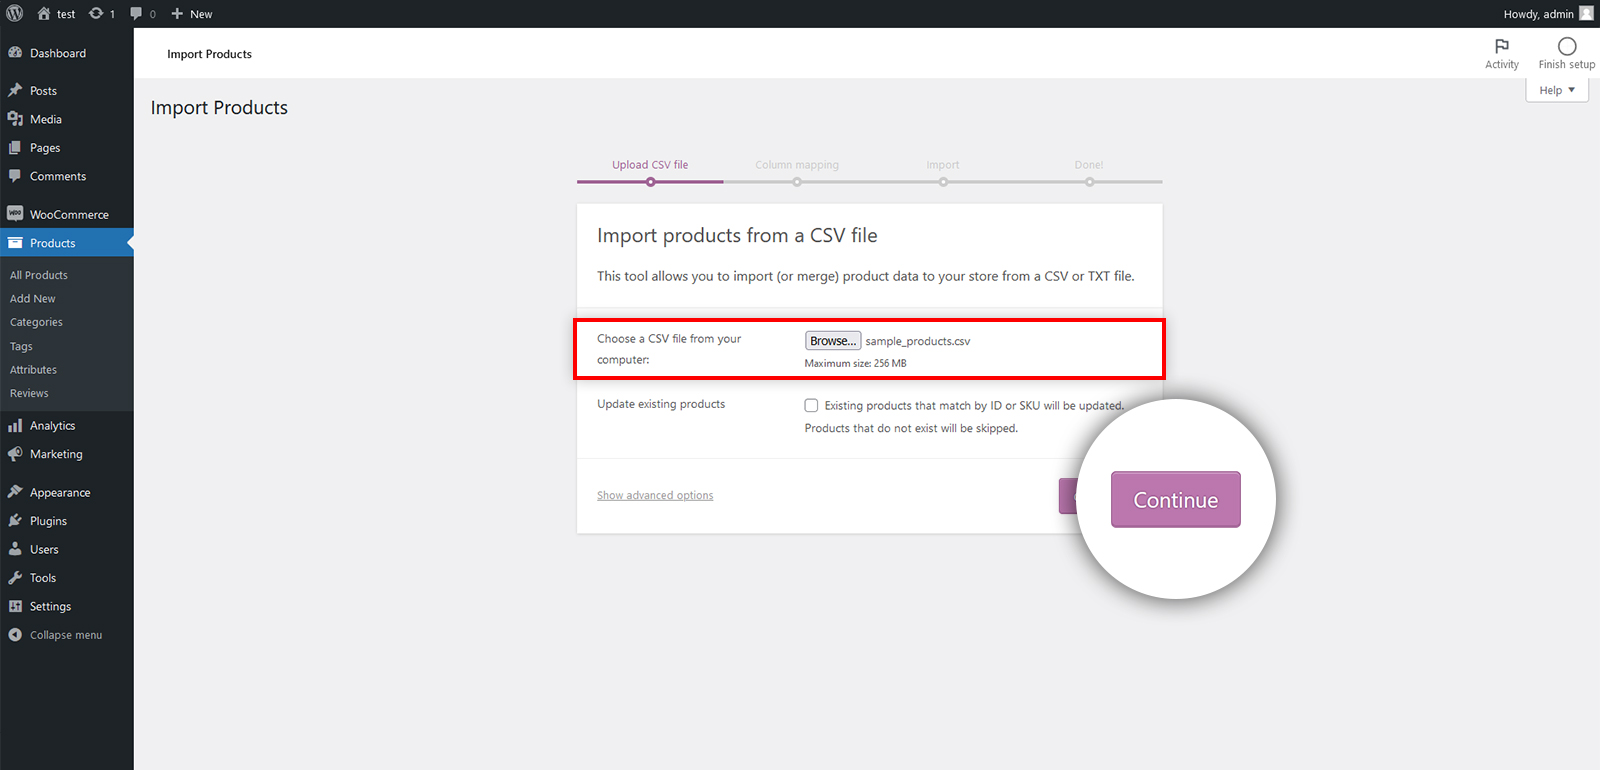
2. Find & Upload the Sample data file
On the screen that follows, you will see an option called “Choose file.” Simply click the Choose file button and select the sample-products.csv file you previously downloaded.Hit the Continue button once you’ve chosen your file.
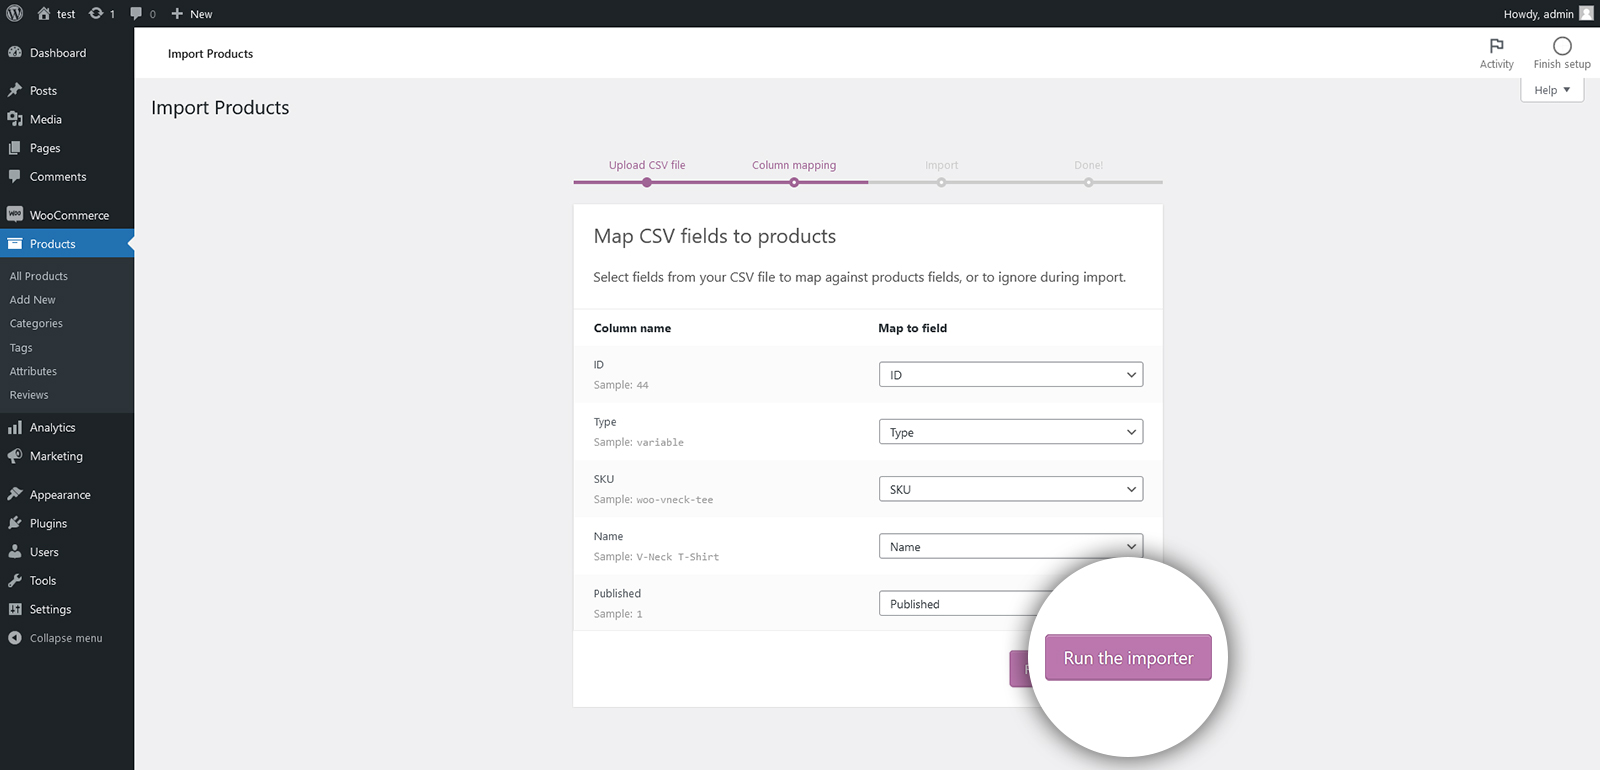
3. Product Column Mapping
The screen for column mapping will appear on the next page.
We suggest keeping all of these parameters at their default configuration.Then scroll down to the bottom of the page. Find and click the Run The Importer button.
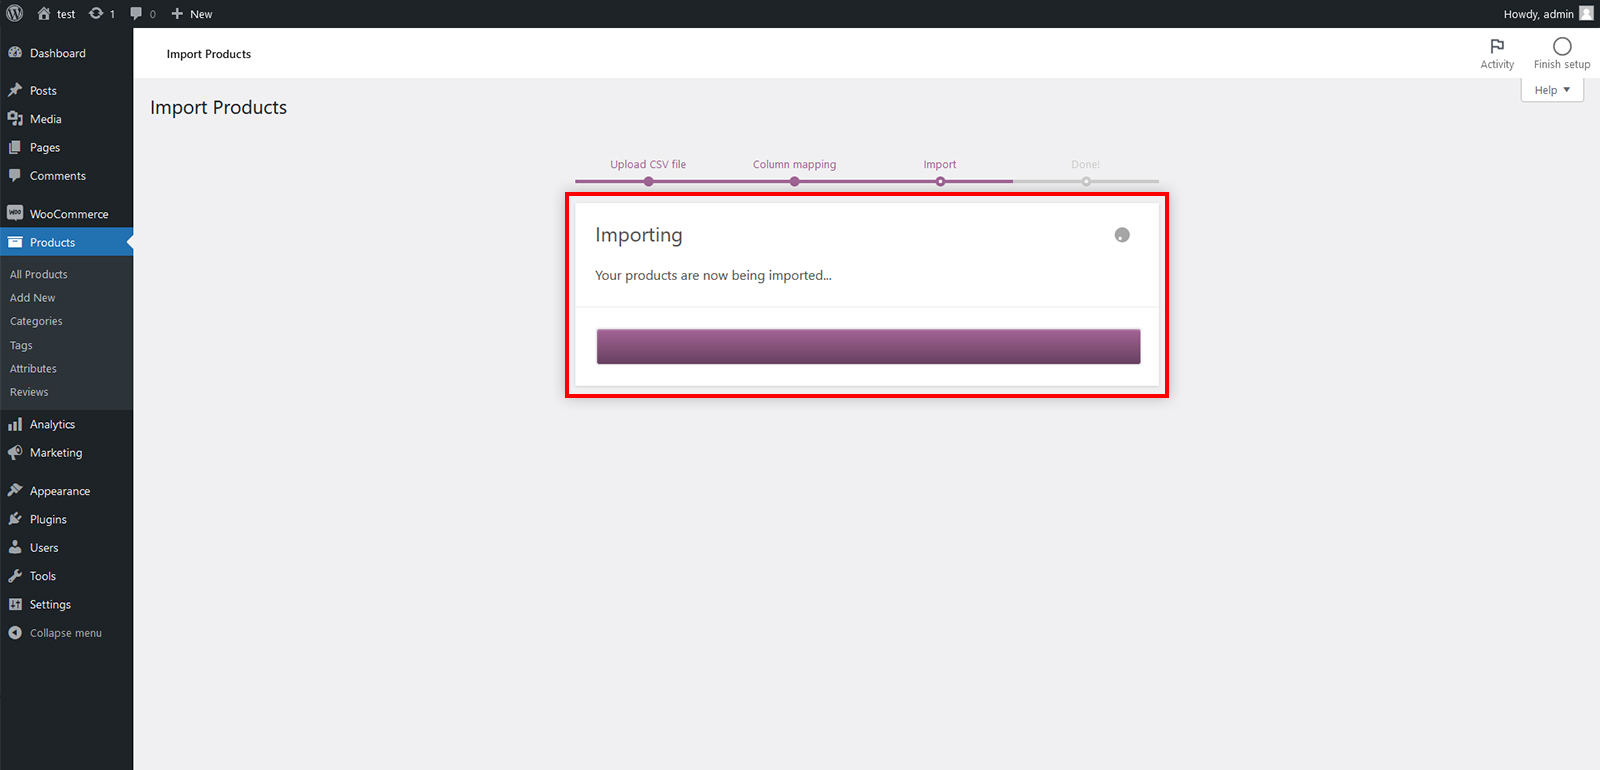
Now, you can relax and wait until the importer brings in the dummy product data. It just takes a very few minutes to complete.
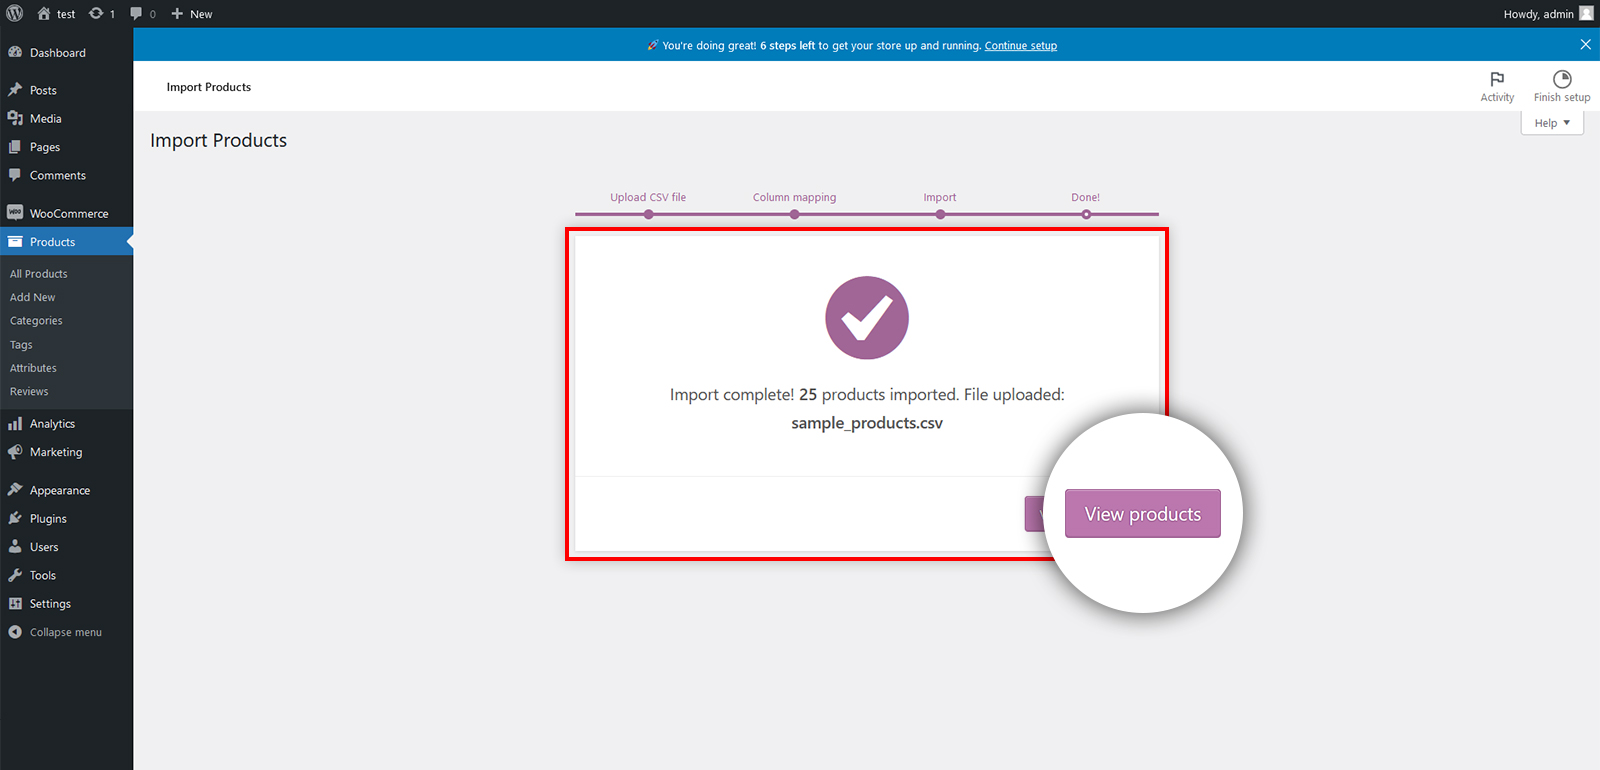
4. Data Imported
Upon completion, you will get the message “Import Complete.” Clicking on the ‘View products’ option will allow you to view all of the newly imported data.
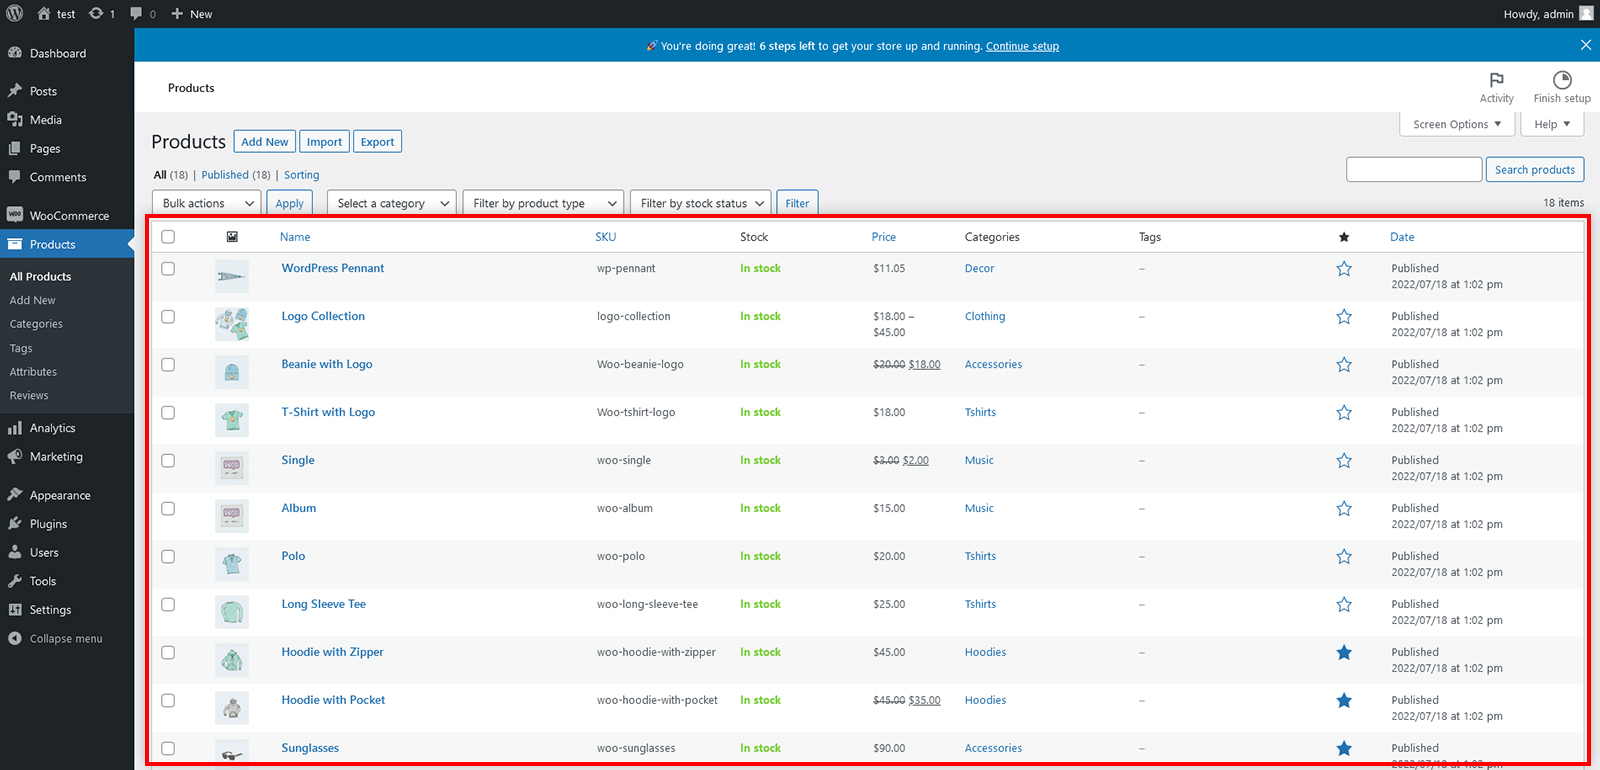
The sample WooCommerce items will appear in the same way as generic products. This information can also be found in the Products area of your site’s admin panel.
5. The Front-end View
Just like other WooCommerce products, you can find and see them on your WooCommerce store.
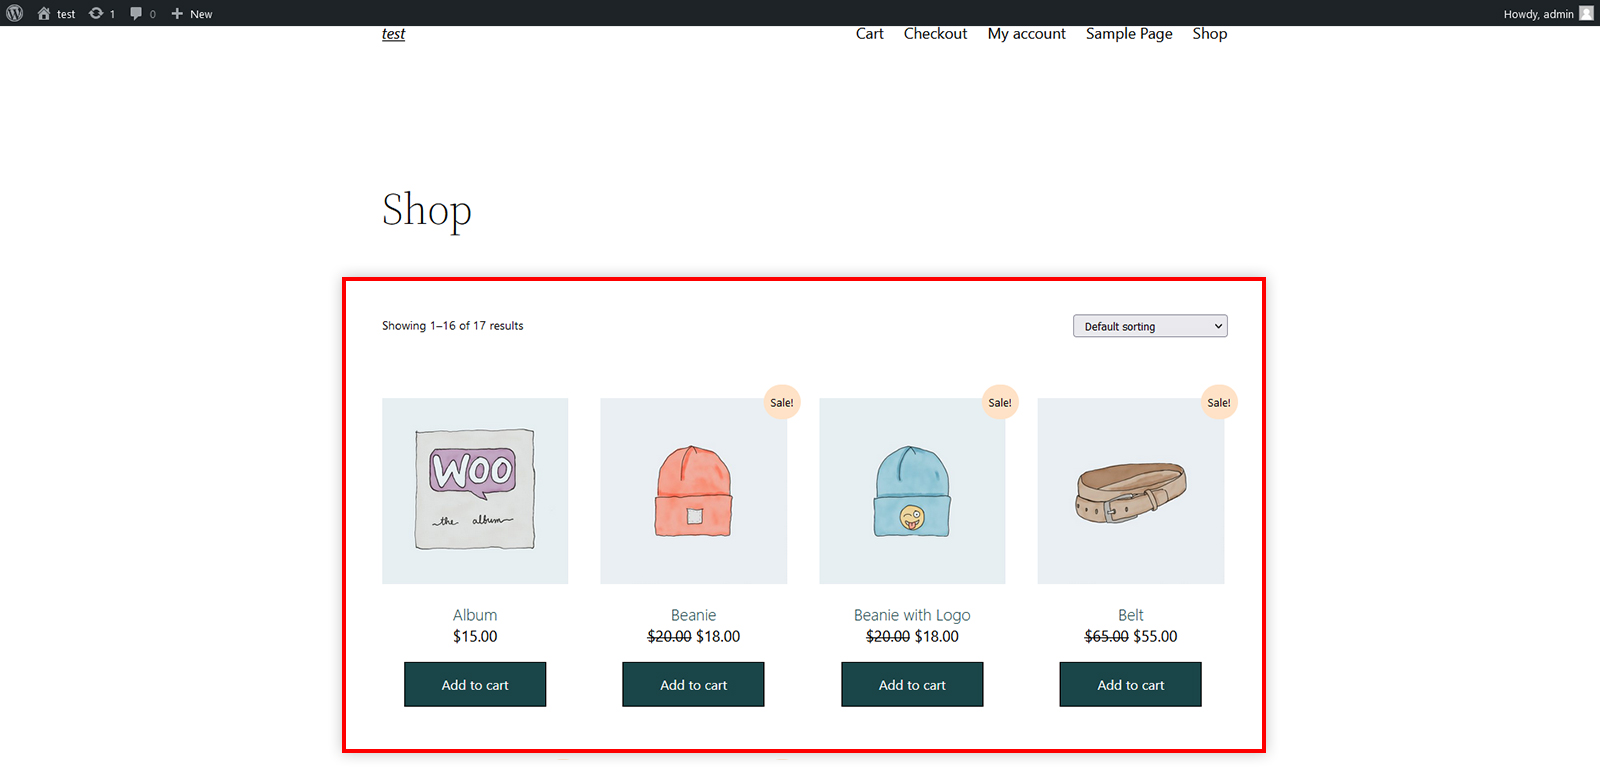
There you have it! Reload your Shop page, and you’ll see that the template has been set up with sample product data.